How to Recover Data After Quick Formatting a Drive (USB, SD Card, HDD…) on Windows?
A quick format does not immediately erase your drive data. Instead, it only removes the file system index, while the actual data often remains on the drive until it is overwritten. This guide shows you step by step how to recover data after a quick format on Windows, along with practical tips to improve recovery success.
Scan your quick-formatted drive with RecoveryFox AI to recover data now ☟
You can still recover files after quick formatting a drive. This article summarizes 6 common methods and you can get a quick glimpse of all solutions from the comparison table below. Just identify your case, then click the chosen method for detailed steps.
Typically $100–$1,000+, depending on damage and device type
Is It Possible to Recover Data from a Quick-Formatted Drive?
Yes, in most cases, it is possible to recover data after quick formatting your storage drive.
A quick format doesn’t erase the actual data. It only removes the file system index, so Windows can no longer locate the files and make the space appear “free” for new data. But the underlying data physically remains on the drive until it is overwritten.
What to Do Immediately After Quick Formatting a Drive?
If you want to maximize recovery success, your actions immediately after formatting matter a lot.
✅ Stop using the drive immediately Do not save new files, install software, or copy data to it.
✅ Do not reformat again Repeated formatting increases the risk of overwriting recoverable data.
✅ Disconnect the drive if possible This prevents background system writes.
✅ Choose a reliable data recovery tool (if no backups) One of the most effective ways to recover data after a quick format is to use a dedicated data recovery tool. And make sure the software works with the drive’s file system and supports the file types you want to recover.
✅ Prepare a different save location for recovered files Do not save the recovered files to the same formatted drive from which you’re trying to retrieve data.
How to Recover Files after Quick Formatting a Drive on Windows?
Below you can find 6 popular ways to recover a quick-formatted drive on Windows.
Method 1. RecoveryFox AI
If you don’t have a backup, using professional recovery software is the most reliable way to recover data after a quick format.
One solid option is RecoveryFox AI. It is designed to handle various data loss scenarios, including accidental Shift-Delete error, emptied Recycle Bin, virus attacks, system conflicts, and quick formatting. It supports 500+ file types, covering most everyday recovery needs.
To recover data from a quick-formatted drive efficiently, download RecoveryFox AI and start a free scan by following the steps below:
Step 1. Download and install RecoveryFox AI on your Windows PC or another safe drive.
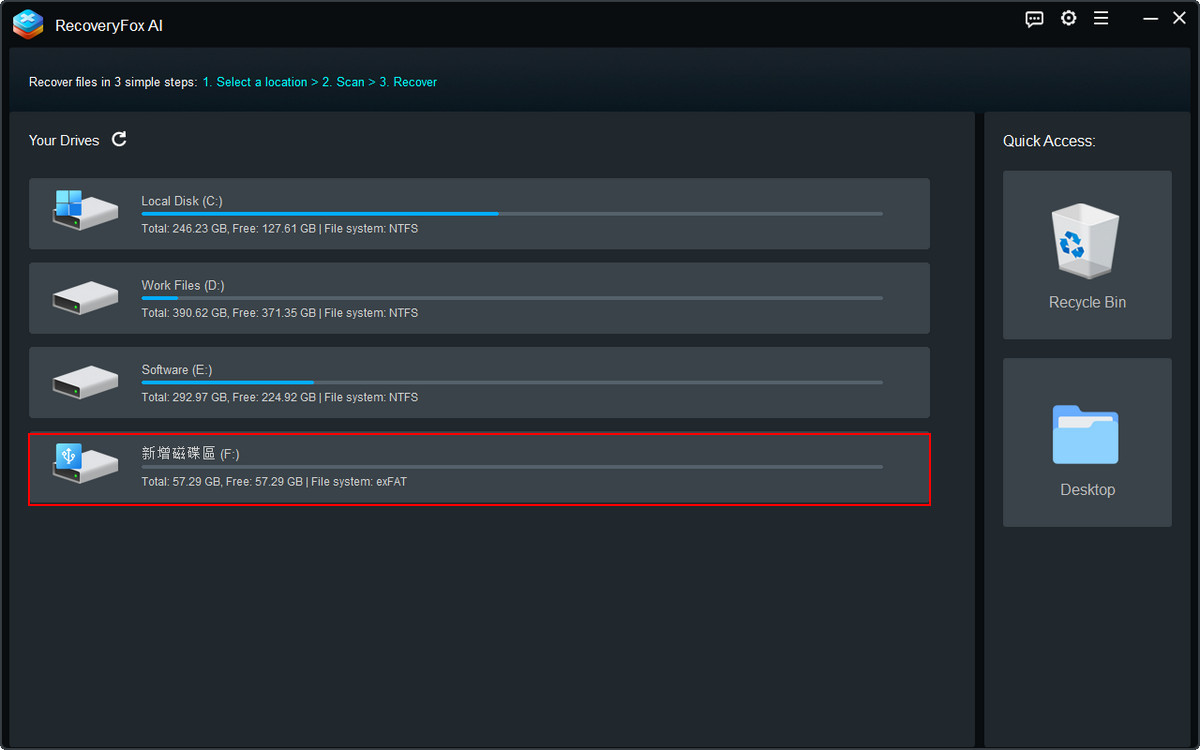
Step 2. Connect the quick-formatted drive and launch the software.
Locate the target drive from the list of detected storage devices and click it to start scanning.
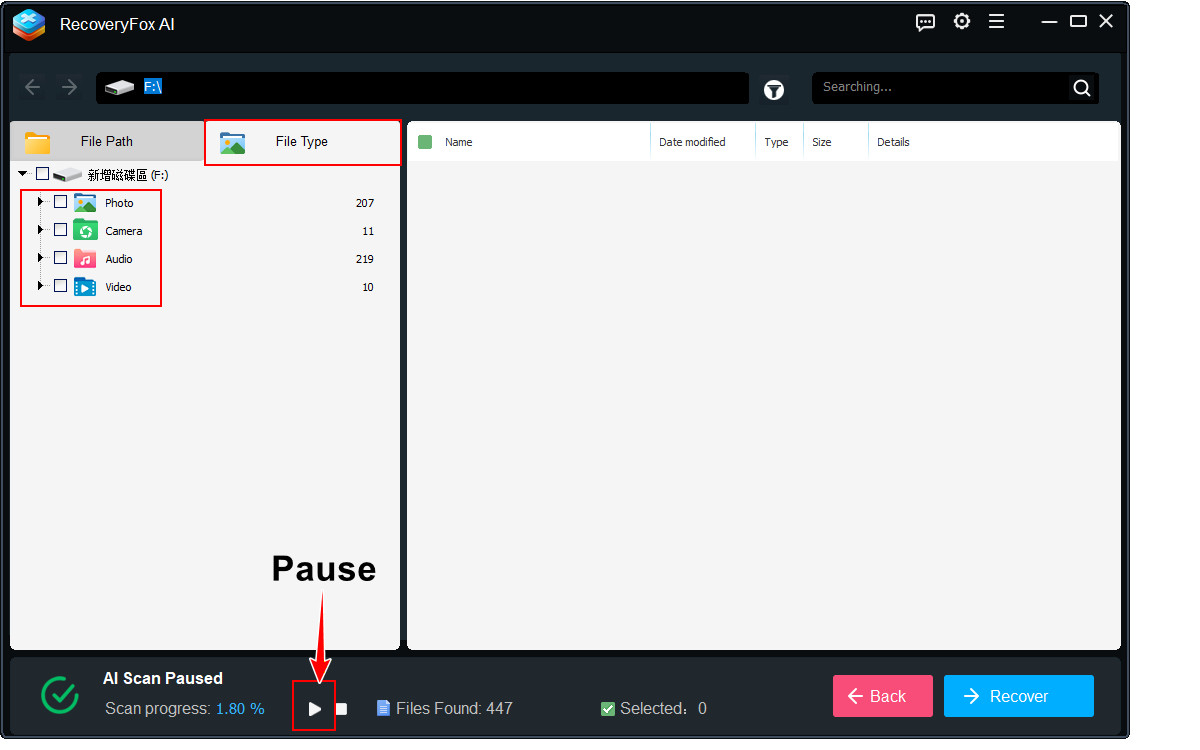
Step 3. For the best recovery results, allow the AI Scan to finish completely. This advanced mode performs a deeper scan, identifies fragmented data, and reconstructs it into complete files.
While the AI Scan is running, you can pause it at any time to preview and browse the detected files by File Type for easier navigation.
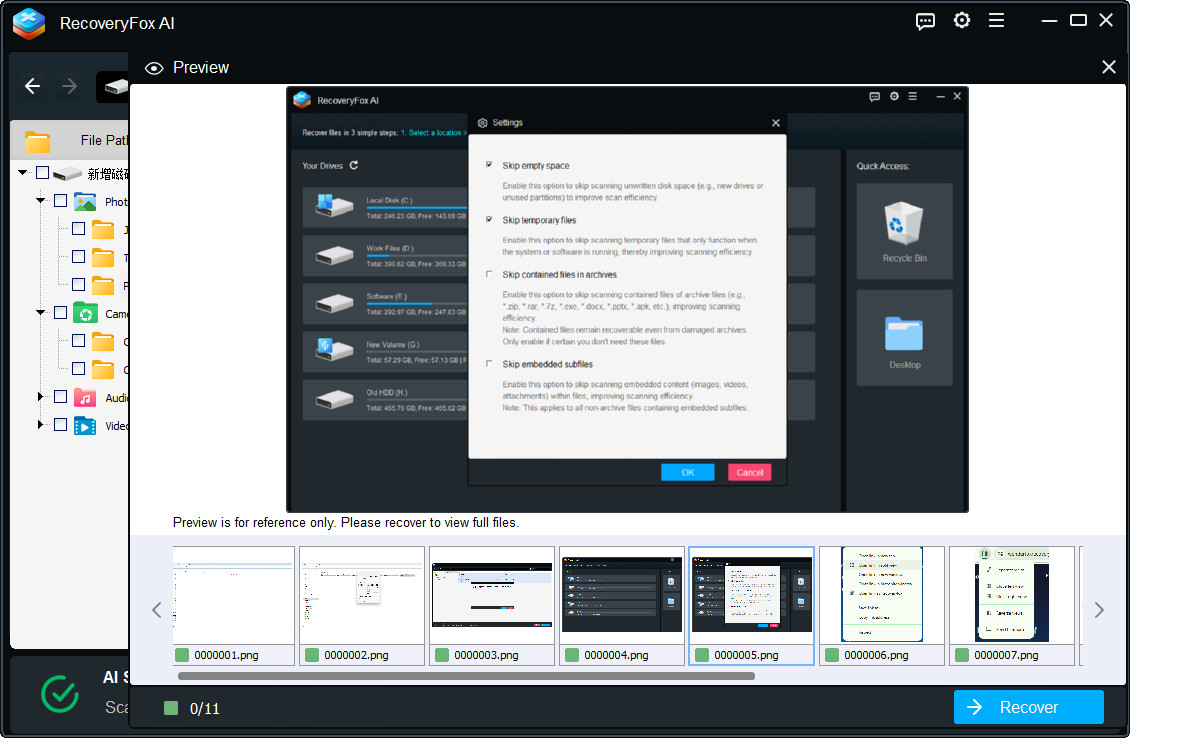
Step 4. Left-click any item and select Preview.
RecoveryFox AI currently allows previewing popular file types, including images, camera photos, documents, text files, and web files.
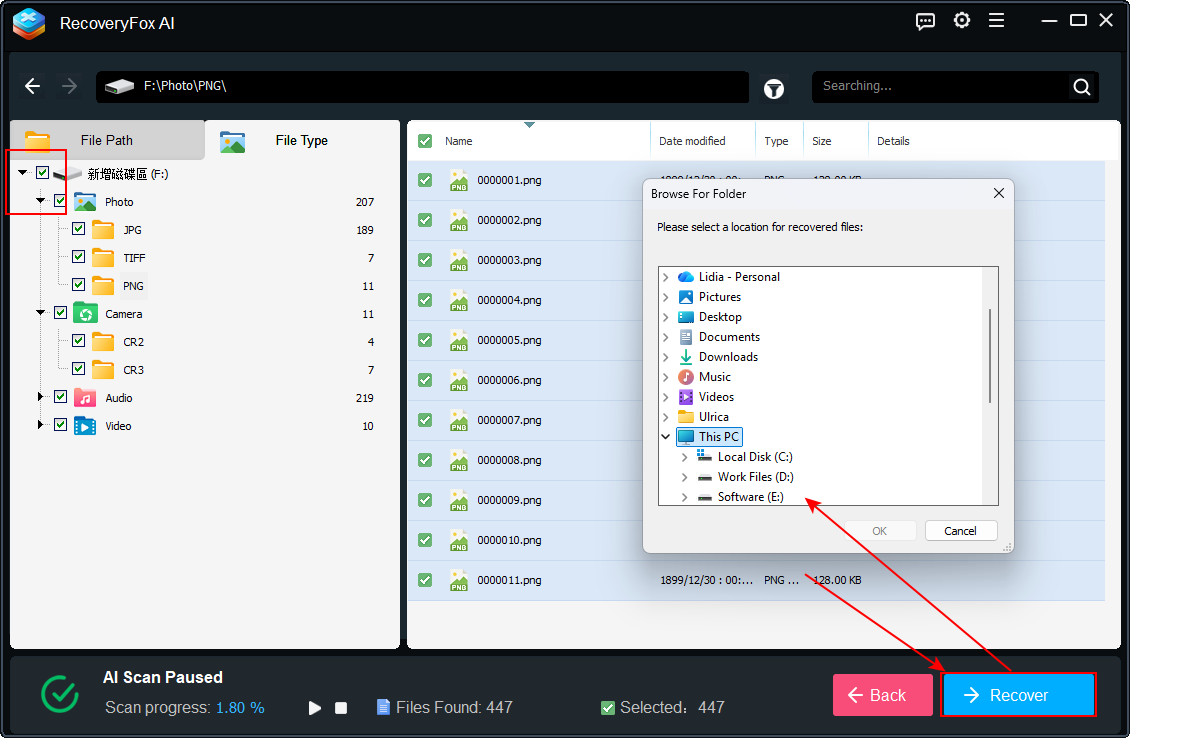
Step 5. Select the needed items, folders, or the whole scanned results, and click Recover.
When choosing the save location, always select a different drive for your recovered files to avoid overwriting.
Method 2. Windows File Recovery
If you have no backups and prefer a free way to recover the lost data on Windows, you can try Windows File Recovery. It’s an official recovery tool for Windows 11/10 developed by Microsoft.
You can use it to recover common file formats from both Windows internal drives and external drives, including HDDs, USBs, and SD cards.
However, it uses a command prompt interface, which may take some time for beginners to get used to.
Here’s how to recover formatted data using Windows File Recovery:
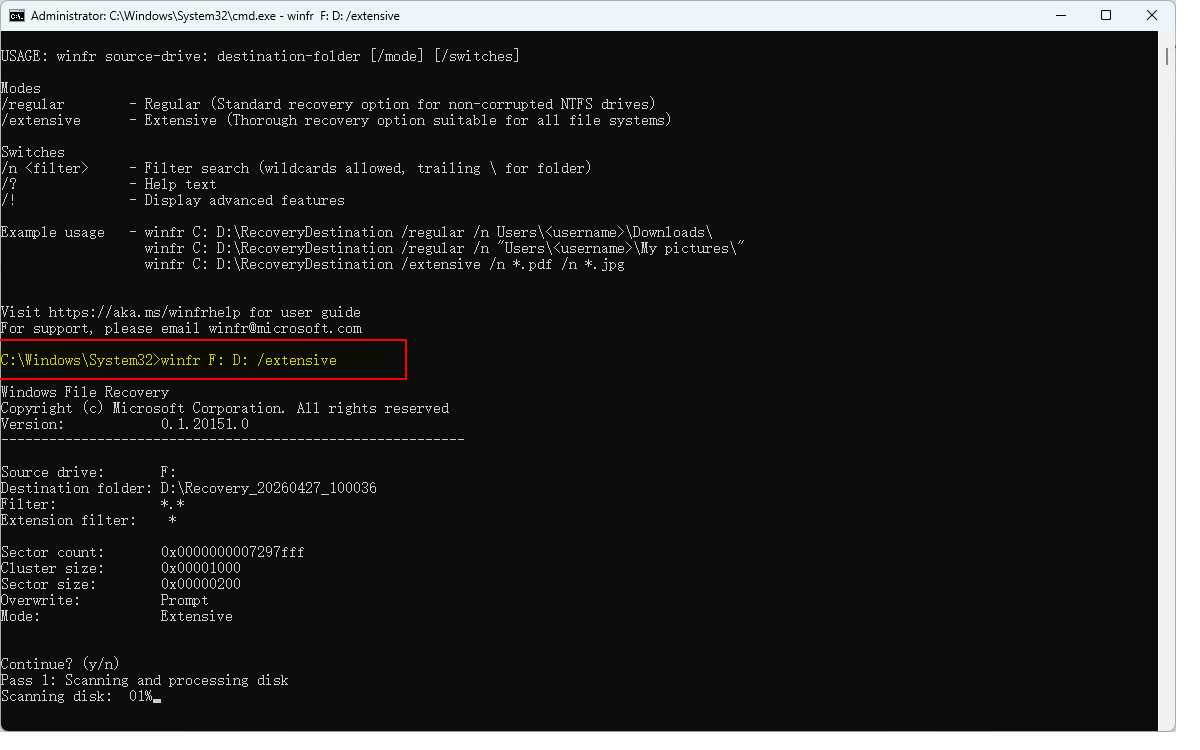
Step 1. Download Windows File Recovery from the Microsoft Store and open it.
Step 2. Run the following command and press Enter.
winfr F: D: /extensive
Replace F: with your formatted drive letter. Replace D: with the drive where you want to save the output files.
Step 3. If prompted to confirm, press Y.
Step 4. Wait for scan completion and press Y to check recovered files.
Method 3. File History
File History is a pre-installed backup solution in Windows. When enabled, it can automatically create copies of your important files at scheduled intervals. If you accidentally perform a quick format on the wrong drive, you may still be able to recover previous versions of your files.
If you’re not sure whether File History was enabled beforehand, you can follow the steps below to check and restore available backup versions:
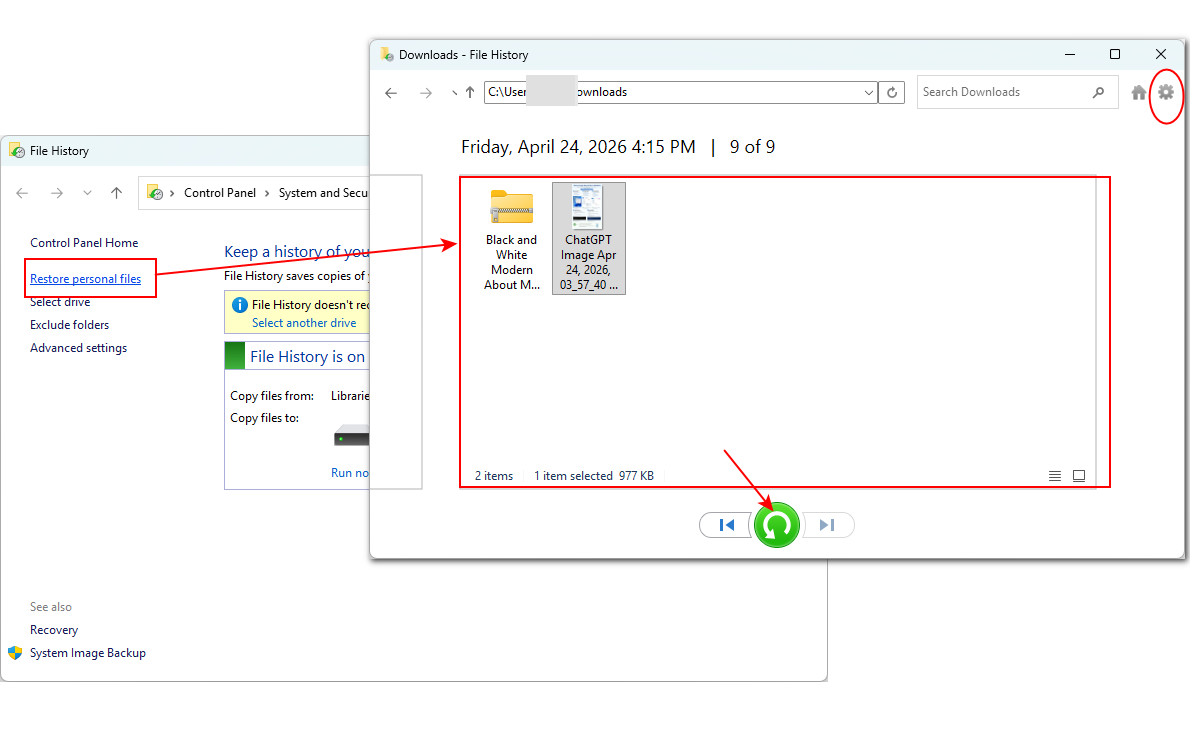
Step 1. Search for “File History” from the start menu and open it.
Step 2. Click on “Restore personal files”.
Step 3. You’ll see a File History window open. Navigate to the formatted drive. Use the arrow buttons below to browse through backup copies (if available).
Step 4. Select the files you want to recover to preview. If you want to restore them to the original location, then click the green button.
But if you want to save them to a different location, click the gear icon at the upper-right and select “Restore to”.
Method 4. OneDrive
If you had OneDrive sync or backup enabled before the quick formatting, you may still be able to recover the lost files from the cloud.
OneDrive can automatically back up selected folders like Desktop, Documents, and Pictures. Since a quick format only affects local storage, it does not delete files already stored in your OneDrive cloud.
Here is how to restore files after a quick format from the cloud:
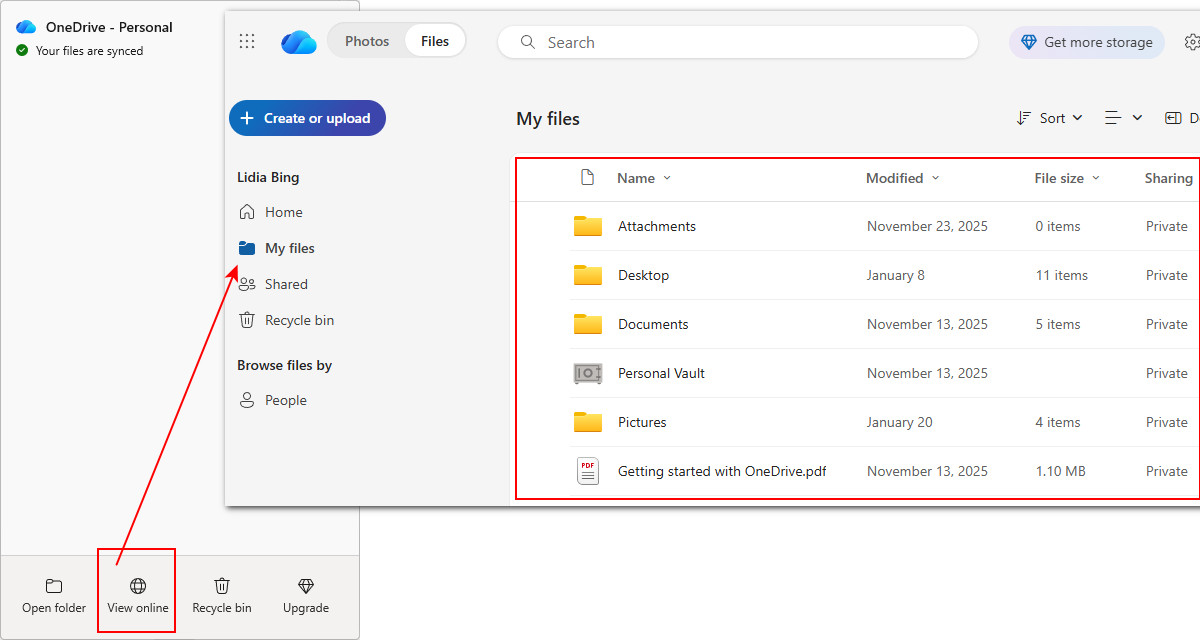
Step 1. Sign in to your OneDrive account.
Step 2. Open synced folders and locate your files.
Step 3. Or, you can choose “View online” and go to “My files” for all synced files.
Step 4. If files are missing, go to the OneDrive Recycle Bin to restore deleted items or use Version History if needed.
Method 5. CMD (Command Prompt)
Windows Command Prompt (CMD) offers several options that can help you regain access to files in certain cases.
Although these options are not built to recover data, they can still be useful in limited situations, especially when files become invisible due to hidden attributes, malware, or file system errors.
# ATTRIB
This ATTRIB command can remove hidden or system attributes and let “disappeared” files show up again.
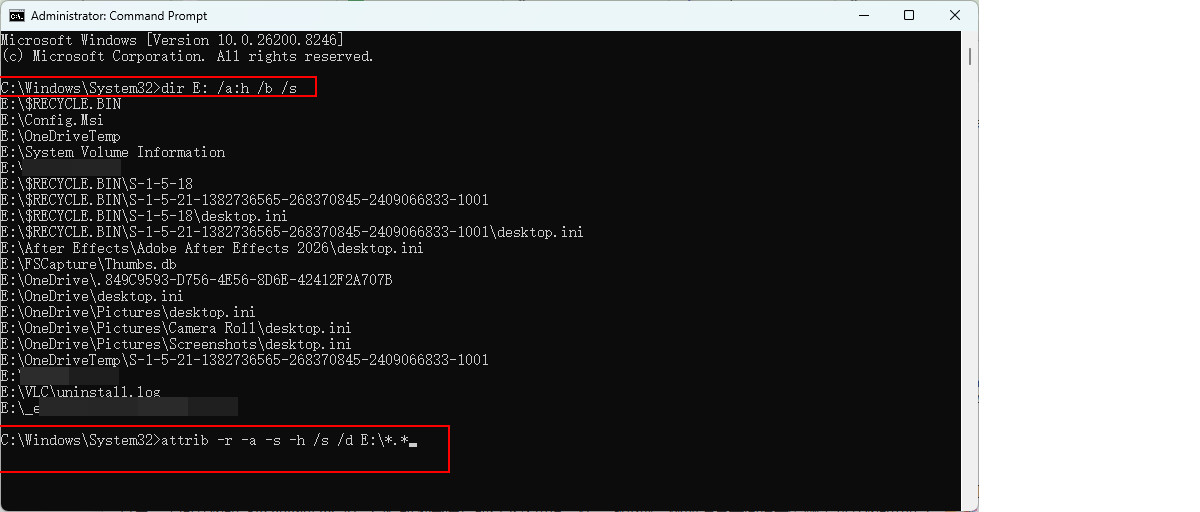
Step 1. If you’re using an external drive, connect it to your computer.
Step 2. Search for ‘cmd” and run it as an administrator.
Step 3. Type the following command and press Enter to show all hidden files in your drive:
dir E: /a:h /b /s
Then execute this command to unhide them.
attrib -r -a -s -h /s /d E:\*.*
Replace E with your drive letter.
Step 4. Reopen the drive in File Explorer and check if your files are visible now.
# CHKDSK
CHKDSK is a Windows utility mainly used to scan and repair file system errors. In some cases, it may help restore files that appear missing due to logical corruption rather than accidental formatting.
Step 1. Connect your quick-formatted drive.
Step 2. Search for “cmd”, right-click Command Prompt, and select Run as administrator.
Step 3. Enter the following command and press Enter:
chkdsk F: /r
Replace F with the assigned letter of your formatted drive.
Step 4. Don’t interrupt the scan. The process may take some time depending on the drive size and condition.
During the repair process, Windows may create a hidden folder named:
FOUND.000
This folder can contain recovered fragments saved as .CHK files.
Step 5. Locate the .CHK files. Switch File Explorer to Details view, so you can better estimate their original formats.
Then try renaming their extensions (e.g., .jpg, .docx) and open them to check if they are usable.
⚠️ Note: Only use this method if you have a backup or no better recovery option available. CHKDSK modifies the file system structure, which may overwrite recoverable data and reduce the success rate of professional recovery tools.
Method 6. Professional recovery service
If all recovery attempts above fail or your formatted drive shows signs of physical damage, for example, clicking or grinding noises from a hard disk drive, it’s time to consider a professional data recovery service.
However, this option is often expensive and time-consuming, with no guaranteed success. It should be treated as a last resort when the data is critical and cannot be recovered by software solutions.
In Conclusion
To conclude, a quick format doesn’t permanently delete your drive data. Instead, it simply clears the file system index that can tell where your files are. The actual data still stays on the drive until it is overwritten. In this guide, we’ve shared 6 effective ways to recover data after a quick format on Windows, plus handy tips to improve recovery success.
However, data recovery is time-sensitive. As soon as you realize you’ve lost important files, stop using that drive immediately. This prevents new data from overwriting your lost files, and gives you the best shot at getting them back.
While recovery tools can often help, no method can guarantee complete results. The most reliable way to avoid permanent data loss is to maintain regular backups of your important files.
FAQs: Recover Quick Formatted Drive
No, recovery is not guaranteed. Even without new data being written, success depends on the drive type; HDDs usually offer higher recovery chances, while SSDs may permanently erase data due to the TRIM command.
For the best chance, stop using the drive and attempt recovery immediately.
Stop using the drive right away. Avoid saving, copying, or installing anything on it, as new data can overwrite recoverable files and make them impossible to get back.
If it’s an external drive, safely unplug it. Don’t connect it again until you’re ready to restore your formatted data with a trustworthy tool like RecoveryFox AI.
Yes, but only in limited cases. You can recover formatted data without software if you have a backup, such as File History, system backups, or cloud storage like Microsoft OneDrive.
Without any backup, manual recovery is not practical. In most cases, you’ll need professional data recovery software or services to retrieve formatted data.
Stop using the SSD immediately and try recovery with a professional tool. However, due to the TRIM command, recovery is less reliable than on HDDs. If available, restoring from a backup is the most effective option.
Self-Service Pages
Most questions about data recovery can be quickly answered in our resource pages. We recommend trying self-service first. You can access the resources here:
Need additional help? Contact us, and we’ll respond promptly.
Discuss with the author
Hi, I’m Ulrica, an experienced editor at WonderFox Soft. I specialize in writing for various tech blogs. Please feel free to contact me if you have any questions or suggestions about today’s article!
Having trouble using RecoveryFox AI, want more info about our software’s features, or need support for additional file types or devices? Please let us know!


 Windows