


 Windows

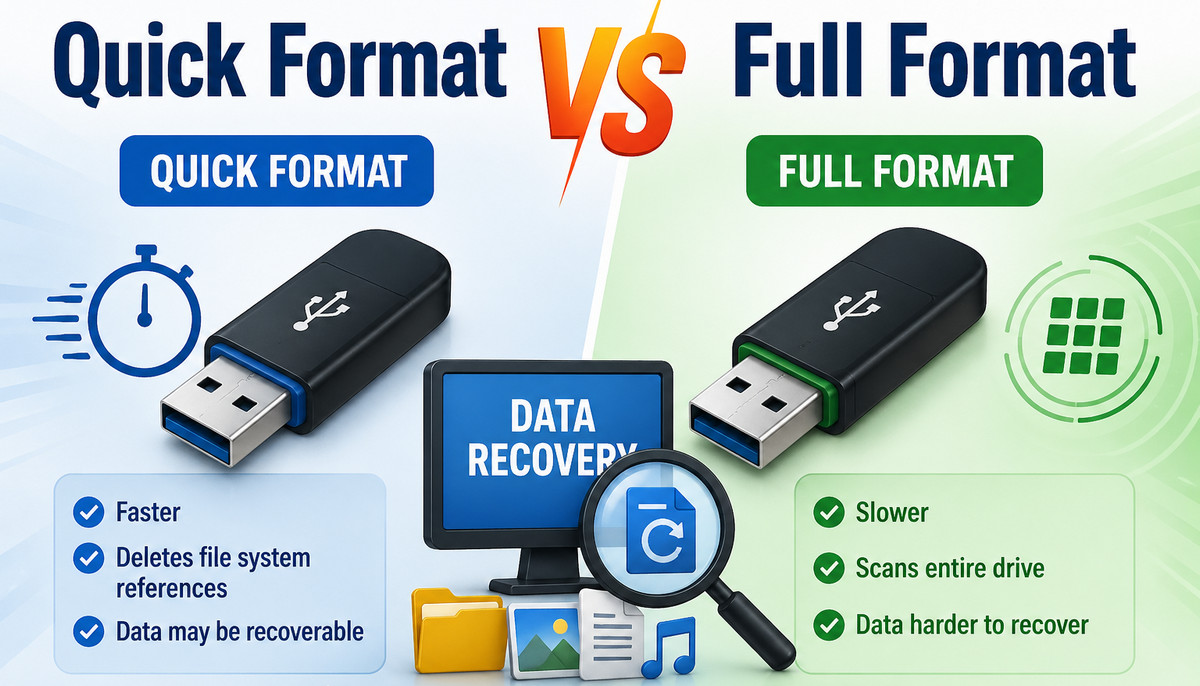
Yes, formatting will empty a USB drive. But a quick format only removes the file table, marking data as free and recoverable until overwritten. Full formats erase everything by overwriting.
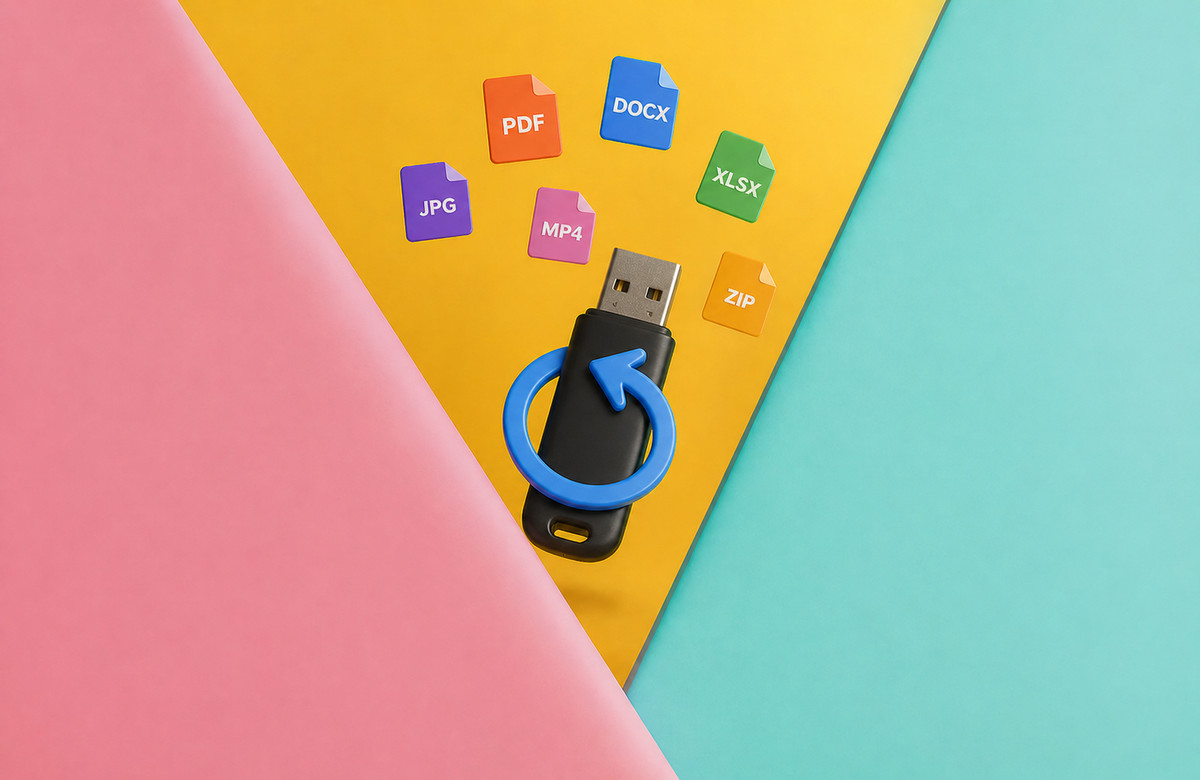
Data loss is more common than you might think. It can happen in seconds due to a simple mistake, like this Reddit user who accidentally formatted an important USB drive and lost all data.
The good news is that formatting doesn’t always erase your files permanently. In many cases, the data remains recoverable, as long as it hasn’t been overwritten by new files.
In this guide, you’ll learn the difference between Quick Format and Full Format, and discover how to recover data from a formatted USB drive on Windows using proven methods.
Does Formatting a USB Delete Everything on It?
Yes, formatting a USB deletes everything on it, whether you run a quick format or a full format.
However, the two format types on Windows handle data differently, which affects how recoverable the data is.
- A quick format clears and rebuilds the file system’s index or allocation tables and marks the storage space as available for new data. The actual data remains on the USB drive until it is overwritten. That’s why data recovery is often possible after a quick format, as long as no new data has been written to the USB drive.
- A full format performs a deeper scan of the drive. It can not only remove the file table and detect bad sectors, but also overwrite data, typically with zeros, across all sectors. This makes formatted USB recovery significantly more difficult or even impossible, since it replaces actual content with empty data.
📢 Note: Most USB flash drives use FAT32 or exFAT because they are widely compatible across Windows, macOS, cameras, and other devices. These file systems use the FAT (File Allocation Table) to track where files are stored.
Some USB drives may also use NTFS, especially when formatted for Windows-only use. NTFS uses the MFT (Master File Table), which stores detailed metadata about each file, including its location on the drive.
What To Do Before Recovering Formatted USB?
Before recovering data from a formatted USB flash drive, it’s essential to follow a few simple yet crucial precautions. These steps can greatly improve the chances of successful recovery.
✅ Stop using the formatted USB immediately.
Do not copy files to it, save new data, or install programs on it. Any new activity may overwrite your lost data and make recovery difficult.
✅ Safely disconnect the drive if it’s not needed.
Unplugging the USB helps prevent accidental writes or background system processes from modifying the data.
✅ Save recovered files to a different location.
Always save recovered data to a different storage device. This helps prevent data overwriting on the original USB drive.
How to Recover Data from a Formatted USB Drive on Windows?
Identify your situation and choose the appropriate recovery method below to start restoring your data from the formatted USB storage as soon as possible.
Solution 1. Use Formatted USB Data Recovery Software
If you don’t have a backup, a professional formatted data recovery software is your most reliable option to recover USB data after a quick format.
One highly recommended tool is RecoveryFox AI. It features an intuitive interface and can recover data from formatted hard drive, as well as from USB drives, SD cards, and other common data loss scenarios. It allows you to scan and preview files for free, so you can quickly check whether your data is recoverable before committing.
Rather than theory, let’s walk through a real recovery process. You can test it immediately with a free scan now!
Here is how to recover data from a formatted USB drive using it:
Step 1. Download RecoveryFox AI and install it on your Windows PC or another external storage device.
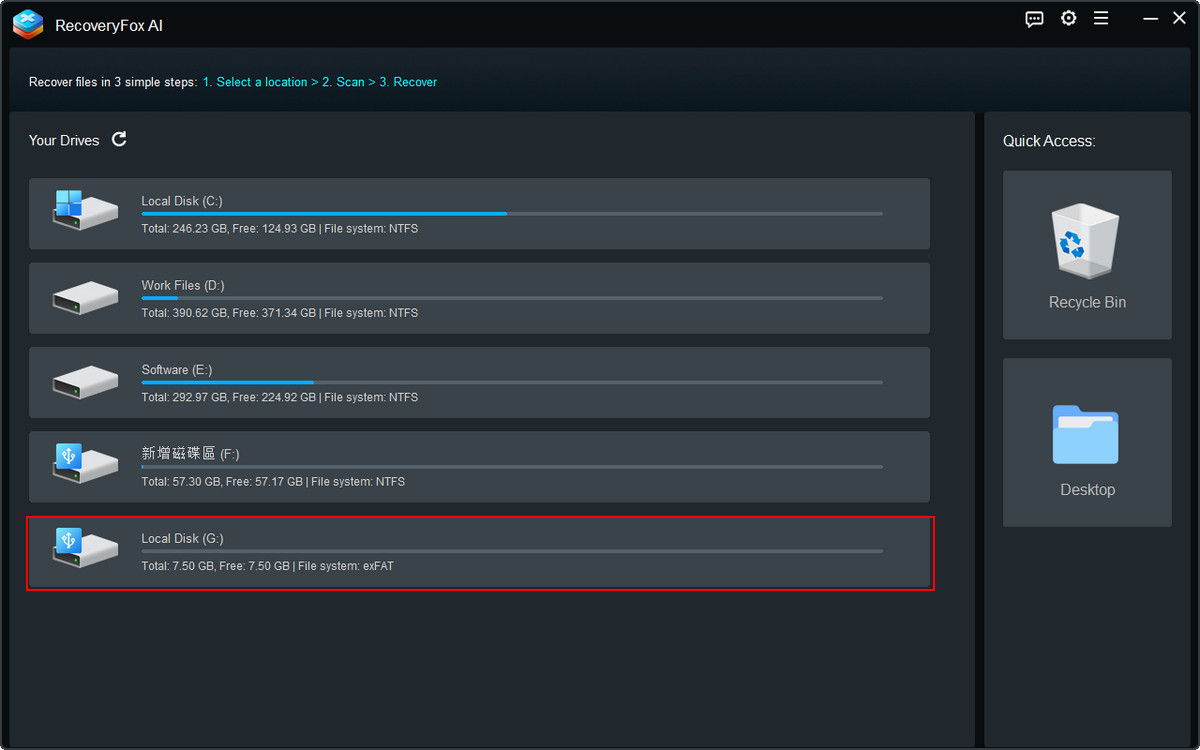
Step 2. Connect your formatted USB to your computer and launch RecoveryFox AI.
Select the target USB from the list of detected storage devices and click it to start scanning.
Step 3. The tool first runs a Quick Scan. This mode is designed to recover files that still retain their original directory paths and typically completes within minutes or seconds.
However, to maximize recovery success, it is recommended to allow the AI Scan to complete fully. This AI-powered mode is built to analyze complex data loss scenarios. It can detect fragmented data and intelligently reconstruct files, even when parts of the original file structure are missing or partially overwritten.
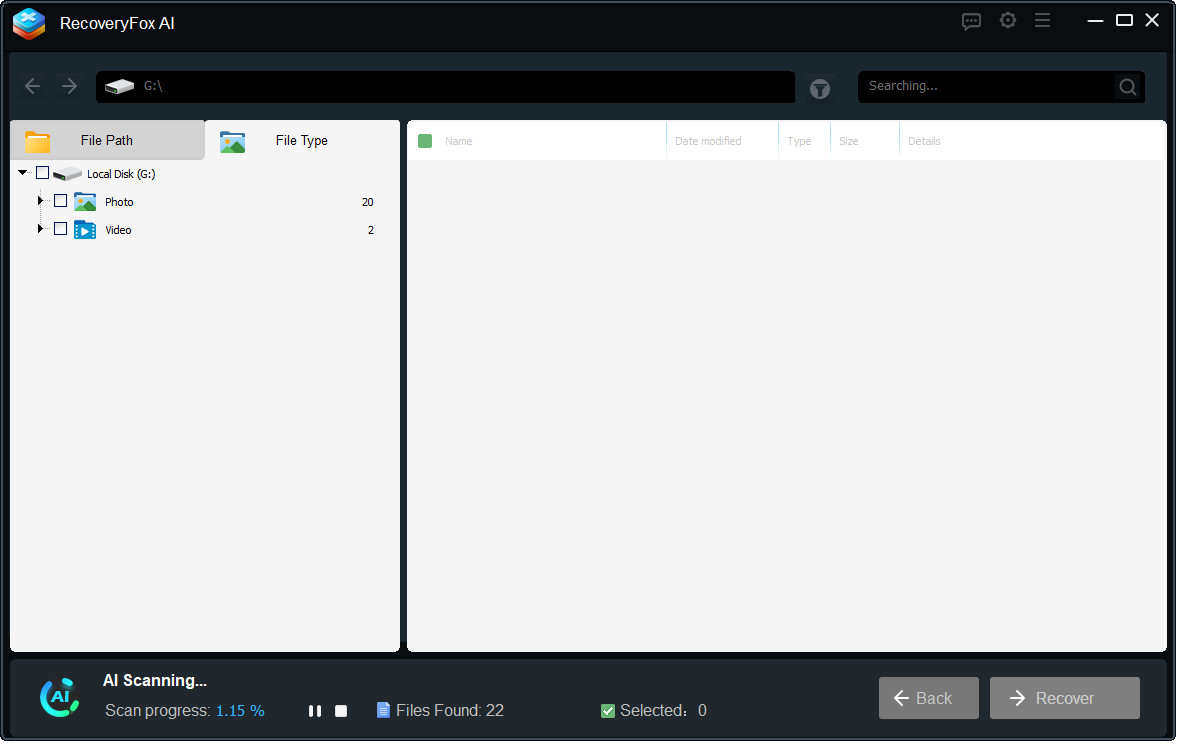
Step 4. You can pause the AI Scan at any time if you want to review results earlier. Then browse the detected files by File Type for easier navigation.
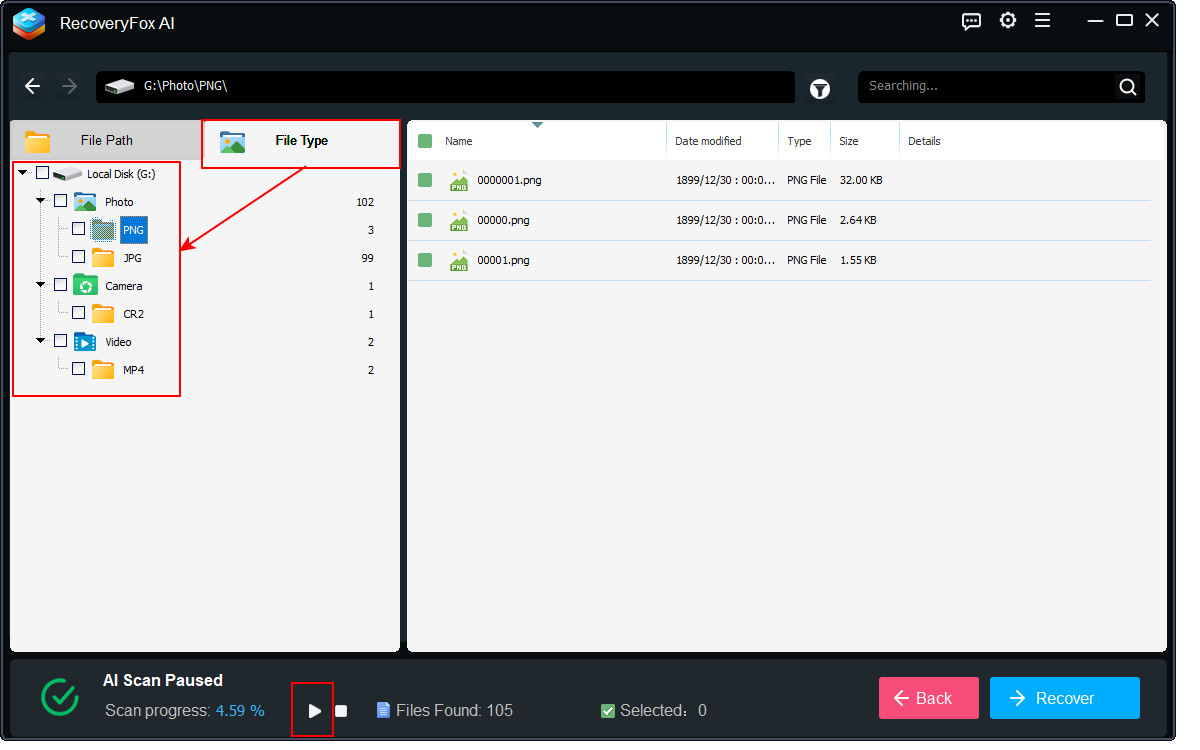
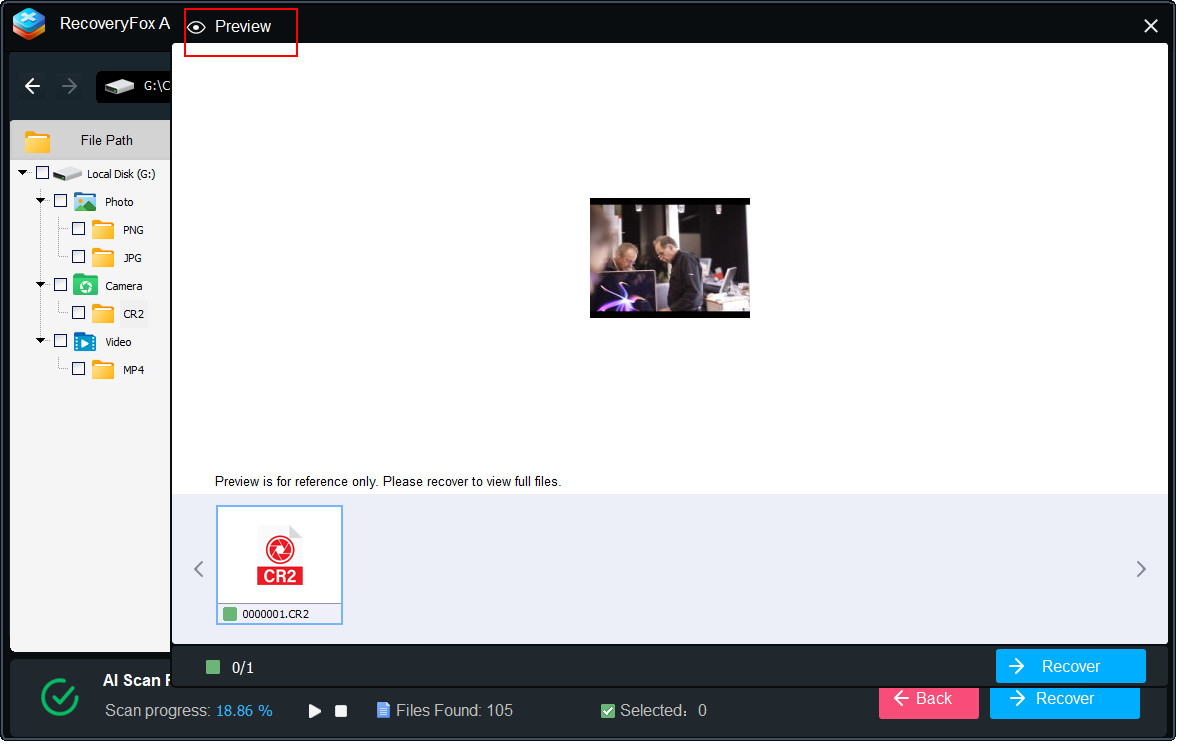
Step 5. Expand the list, right-click any item, and select Preview.
RecoveryFox AI currently lets you preview common file types such as images, camera photos, webfiles, documents, and text files.
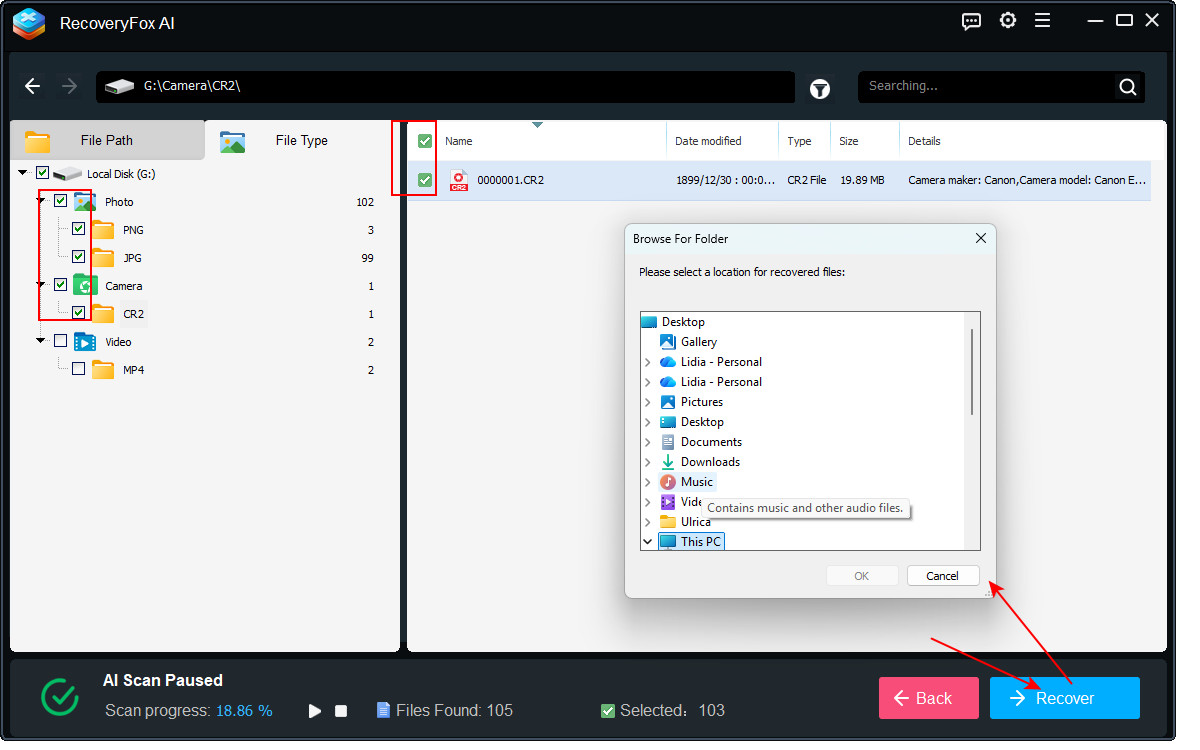
Step 6. Once you confirm the files you need, select them and click Recover.
Always save recovered files to a different drive or location. This prevents overwriting existing recoverable data on the USB drive.
Solution 2. Use Windows File Recovery
To recover data from a formatted USB flash drive for free, you can use Windows File Recovery. This is an official, command-line based recovery tool by Microsoft.
Although it doesn’t have a user-friendly graphical interface, it’s powerful and can recover deleted or lost files from Windows internal drives, as well as external devices.
Here is how to recover a formatted USB drive using Windows File Recovery:
Step 1. Windows File Recovery is not installed on Windows by default. To use it, you need to first download it from the Microsoft Store.
Step 2. Plug your USB device and launch the command recovery tool.
You’ll see a Command Prompt window open with a simple instruction sheet inside. It tells you the usage syntax, lists of available modes and switches, and examples of how to use it.
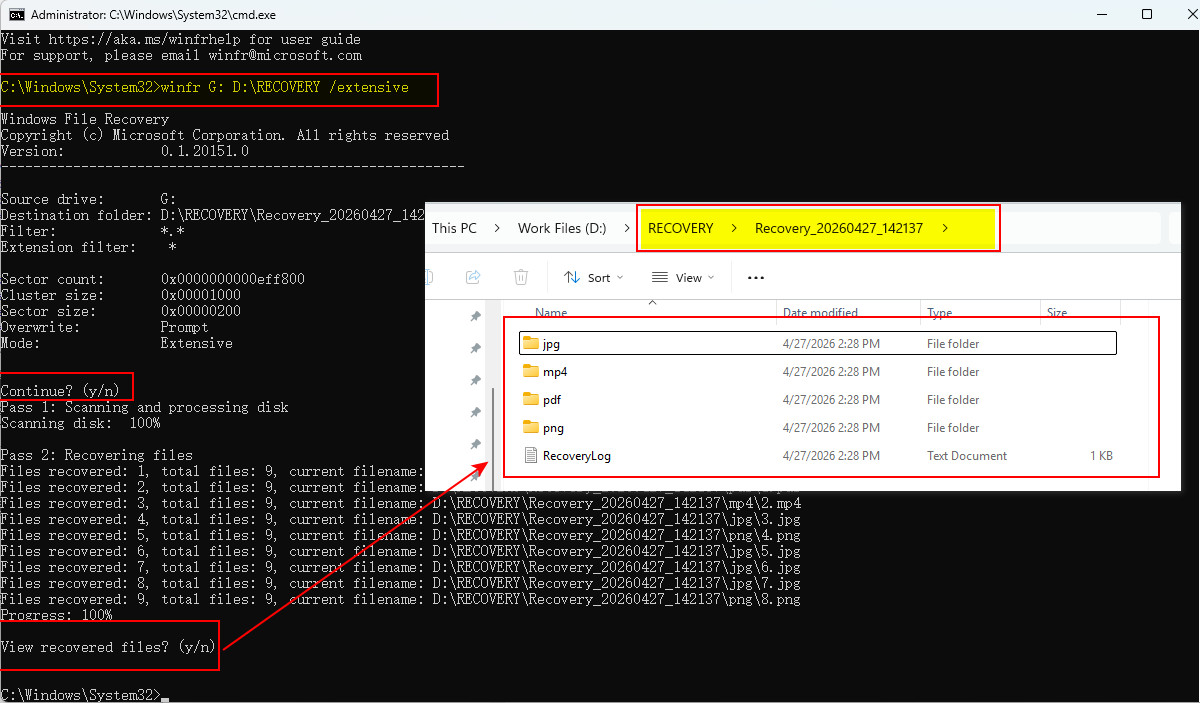
Step 3. Now, run this command to recover files from your formatted USB flash drive and press Enter:
winfr G: D:\RECOVERY /extensive
(❗ Note: Replace G with your USB letter, and D:\RECOVERY with the path you choose for the save location.)
This command will run a deep scan for all files on your USB.
Step 4. Press “Y” to start scanning.
Press “N” to cancel it.
If you want to stop the scan during the process, press Ctrl + C.
Step 5. After the scan completes, check the output folder for your recovered file. The recovered files are usually saved in a folder named in this format:
Recovery_[date-time].
Solution 3. Use CMD (Command Prompt)
Command Prompt (CMD) in Windows can also assist with USB data recovery in certain cases. By running built-in commands through cmd.exe, you may be able to restore access to lost files or repair certain file system errors.
❗📢 But only use these options after backing up your data if possible, as it may alter the drive.
Option 1. CHKDSK
If your USB data is invisible due to file system errors rather than an intentional format, you can use the CHKDSK utility to scan and repair the drive.
CHKDSK helps detect logical errors in the file system and may restore accessibility to corrupted or unreadable data in some cases.
Step 1. Connect the USB drive and open File Explorer > This PC to confirm its assigned drive letter. Make sure no files on the USB are open or in use before proceeding.
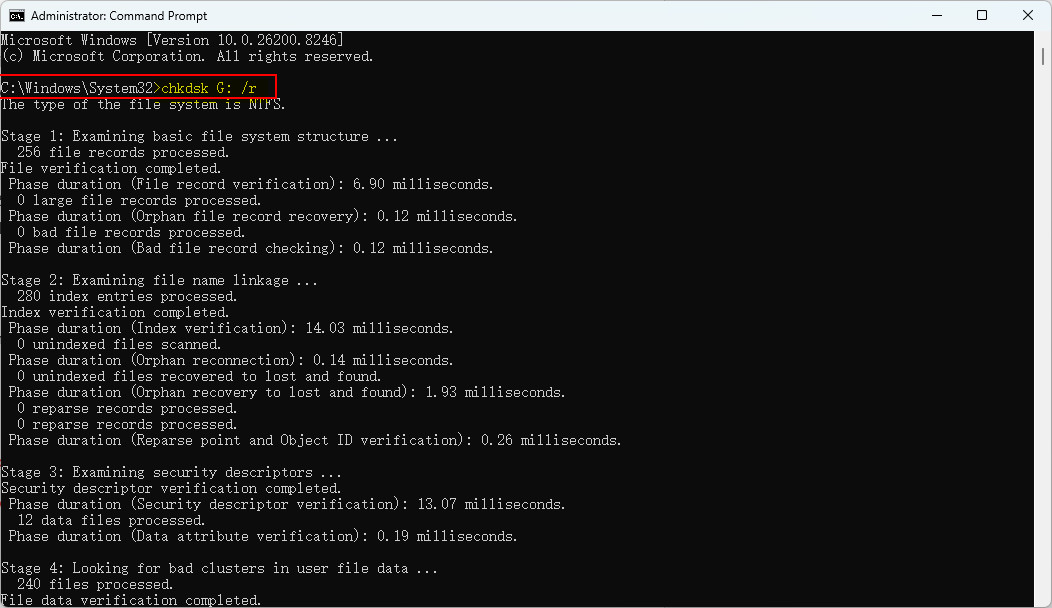
Step 2. Press Win + S, type “cmd”, then right-click Command Prompt and select Run as administrator.
Step 3. Type this command and press Enter.
chkdsk G: /r
🔔 Replace G: with the correct drive letter of your USB flash drive.
/r instructs CHKDSK to locate bad sectors, attempt data recovery, and repair file system errors.
Step 4. Wait for the scan to complete. The process may take some time, depending on the drive size and condition. During the repair process, Windows may create a hidden recovery folder named:
FOUND.000
This folder can contain recovered file fragments saved as .CHK files.
Step 5. Sort the .CHK files by size to help identify their possible file types.
Then, rename the file extensions based on the estimated format. For example, change FILE0001.CHK to FILE0001.jpg, and attempt to open the file to verify whether the recovered data is usable.
⚠️ .CHK files are raw recovered fragments. Many may be incomplete or unusable, and file recovery success is not guaranteed.
Option 2. ATTRIB command
In some cases, files are not actually deleted; they may have been marked as hidden due to system errors or malware activity. One of the simplest ways is to use the ATTRIB command to reveal hidden files.
Step 1. Connect your USB.
Step 2. Search for “cmd” and run it as an administrator.
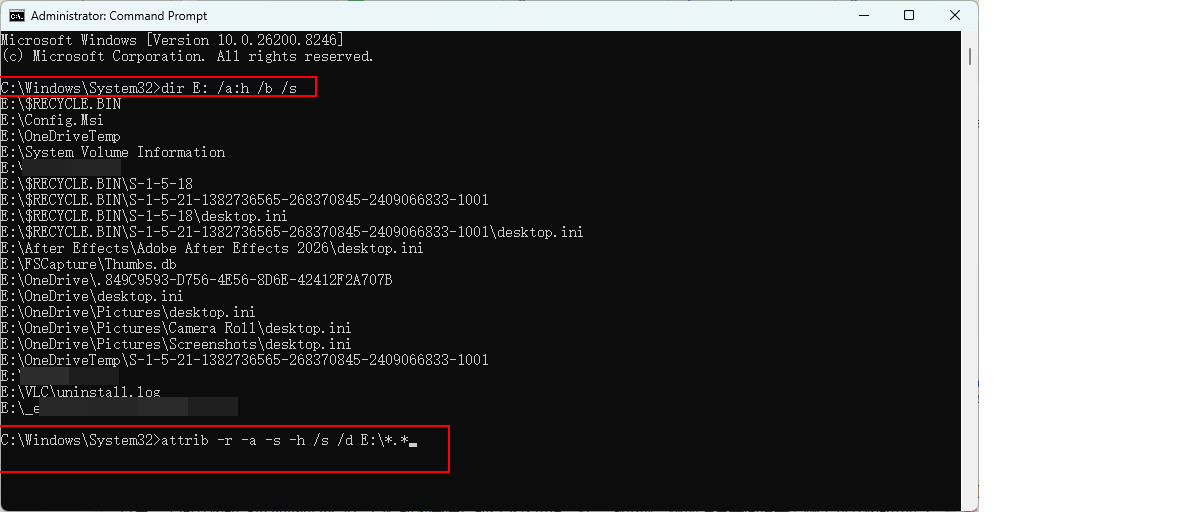
Step 3. You can first use this command to check all hidden files in your drive:
dir E: /a:h /b /s
Then, type the following command and press Enter to unhide them:
attrib -h -r -s /s /d E:\*.*
🔔 Don’t forget to replace “E” with the assigned drive letter of your USB flash drive.
Step 4. Reopen the USB drive in File Explorer. If the issue was caused by hidden attributes, the files should now be visible again.
Solution 4. Use a Professional Recovery Service
Professional data recovery services are often expensive, but they become essential when your USB has physical damage or when the data is extremely important and cannot be risked with DIY methods.
If you choose this option, consider the following tips to avoid costly mistakes and unreliable labs:
1. Look for a “No Data – No Fee” policy
Reputable services typically only charge if your data is successfully recovered.
2. Understand data handling procedures
Ask how your device and recovered files will be handled, stored, and protected during the process.
3. Request a free diagnosis and clear quote
Many providers offer a free, no-obligation evaluation. Always confirm pricing details before approving recovery work. Be cautious of services that require full payment upfront.
4. Check reputation and success rate
Choose providers with a proven track record. Review feedback on platforms like Reddit, local community on Facebook, Google Reviews, Trustpilot, or relevant tech forums.
5. Request a recovery report
Ask for a detailed report listing the recoverable files so you can evaluate the results before deciding whether to continue with the service.
In Conclusion
It’s possible to recover data from a formatted USB drive, especially after a quick format and the data has not been overwritten by new files.
If no backup is available, using professional data recovery software is one of the most effective solutions. Tools like RecoveryFox AI allow you to perform a thorough scan of the formatted USB flash drive and reconstruct recoverable files with just a few clicks. Its scanning process operates in a read-only mode, ensuring that your storage device and remaining data are not modified during recovery.
FAQs: Recover Files from Formatted USB Flash Drive
You cannot directly “unformat” a USB drive, but you can recover data from a formatted USB using data recovery software or backups, as long as the original data has not been overwritten by new files.
First, identify the cause of data loss. If the issue is due to file system errors or hidden files, you may be able to restore access using Command Prompt (CMD).
However, if the USB drive was actually formatted, recovery without software is generally not possible unless you have a backup. Windows users can check whether Previous Versions are available (if File History or System Restore was enabled).
To avoid losing files, you should create a backup before formatting. If needed, you can perform a quick format and then attempt recovery using a data recovery tool (e.g., RecoveryFox AI). Alternatively, consider deleting or reorganizing specific files instead of formatting the entire drive.


