CATEGORIES
![]() OVERVIEW
OVERVIEW

![]() Getting Started
Getting Started
![]() INTERFACE AND BUTTONS
INTERFACE AND BUTTONS
![]() HOW TO USE
HOW TO USE
RECOVERYFOX AI PRODUCT MANUAL
Recover Smarter, Restore Safer
PART 4. HOW TO USE RECOVERYFOX AI
4.3 Recover Files from Desktop
Follow the 3 steps below to recover Desktop lost data or files permanently deleted using “Shift + Delete”.
Accidently replaced an important file with one having the same name on desktop? RecoveryFox AI also makes it possible to retrieve the overwritten filles back.
To maximize the chances of successful recovery, immediately close all running applications. As files on the desktop are particularly vulnerable to being overwritten, so prompt action is essential.
* Available on:![]() Windows
Windows
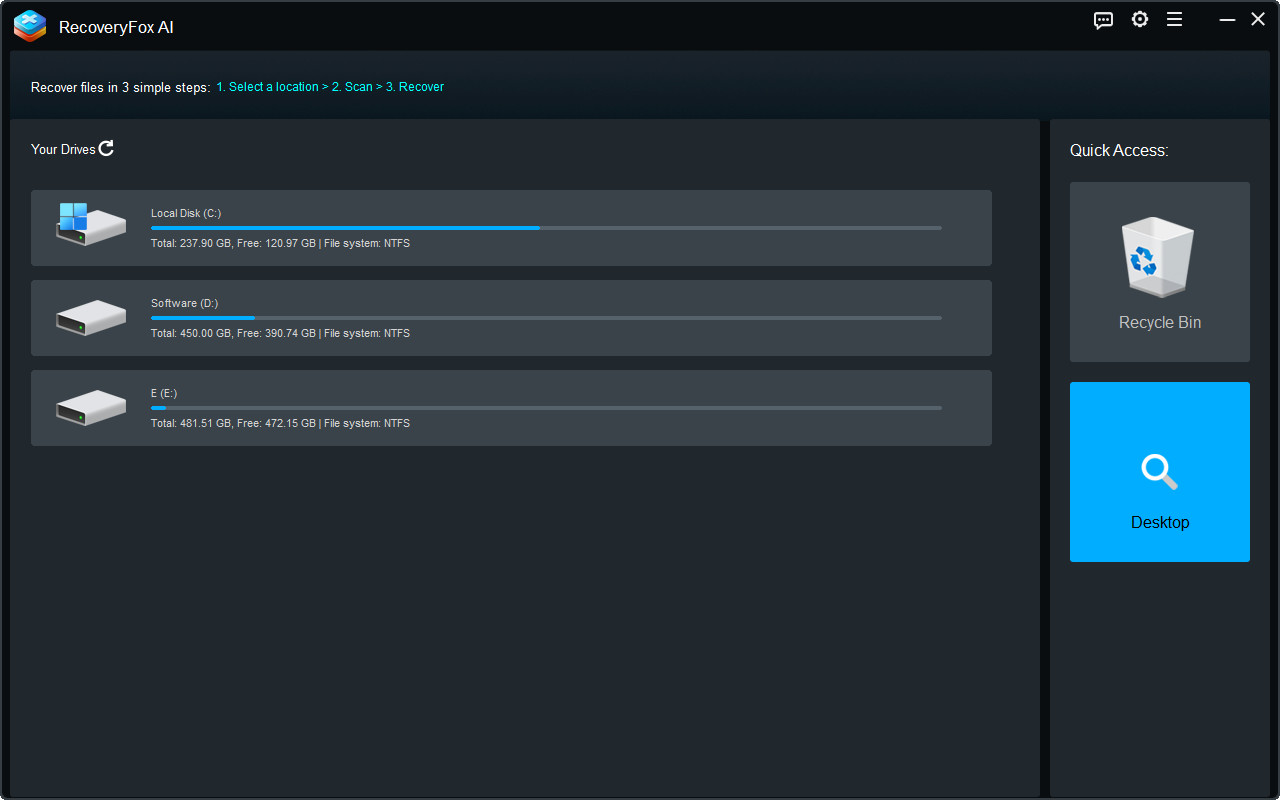
Step 1. Select Desktop as the Scan Location
On the right side of the startup interface, click Desktop to start scanning for missing desktop data.
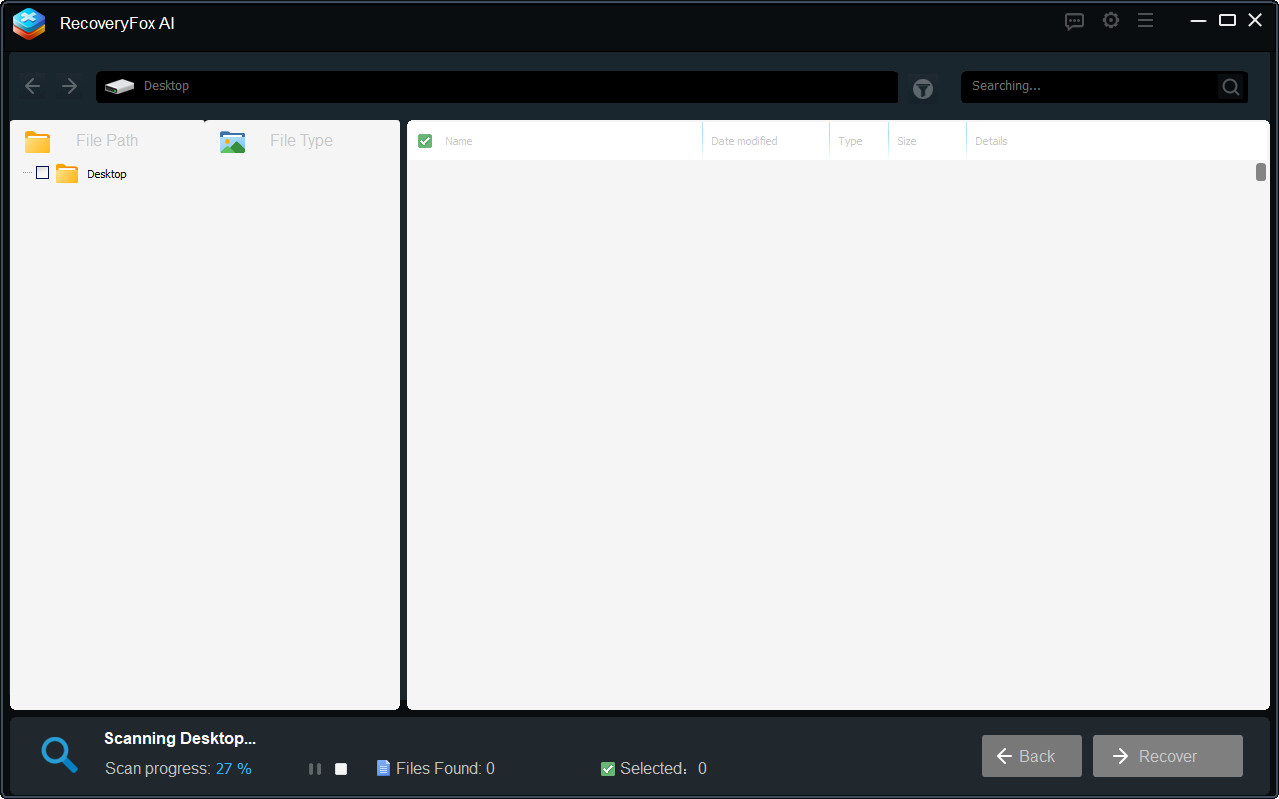
Step 2. Start Desktop Scanning
RecoveryFox AI runs Quick Scan followed by AI Scan for Desktop recovery. At the bottom of the scanning interface, you can monitor the progress and view detected files in real time.
You can pause the AI Scan at any time to preview the scan results and recover the files you need.
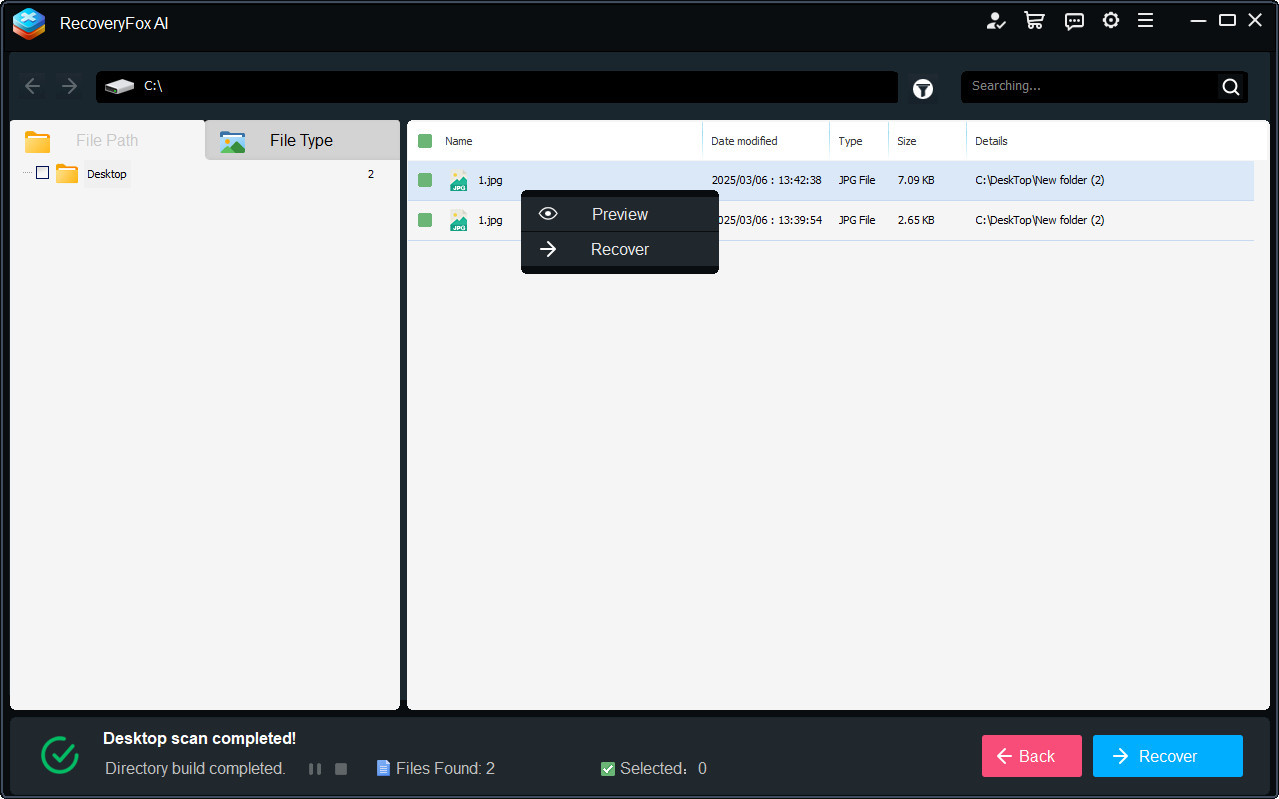
Step 3. Preview and Recover Desktop Files
Take advantage of the convenient filtering options to quickly locate your files.
Right-click on a specific file to “Preview” and “Recover” it.
Also, you can select multiple files, a type category, or the entire “Desktop” folder to recover.