


CATEGORIES
![]() OVERVIEW
OVERVIEW

![]() Getting Started
Getting Started
![]() INTERFACE AND BUTTONS
INTERFACE AND BUTTONS
![]() HOW TO USE
HOW TO USE
RECOVERYFOX AI PRODUCT MANUAL
Recover Smarter, Restore Safer
PART 3. INTERFACE AND BUTTONS
Understanding the interface is the first step to making the most of your data recovery experience.
In this section, we’ll guide you through the layout and key components of the RecoveryFox AI interface. You’ll learn about the various buttons, menus, and tools available to help you navigate and use the software efficiently.
3.1 Startup Interface
After launching the software, you’ll be greeted by the main interface. In the top-right corner of the interface, you can find options for registration, purchase, support, language, our social links, contact, and software’s details section.
- Settings
On the right menu bar, click the cogwheel icon to open the [Settings] window. Enable these options to improve scanning efficiency by skipping empty space, temporary files, contained files of archives, or embedded content within files.
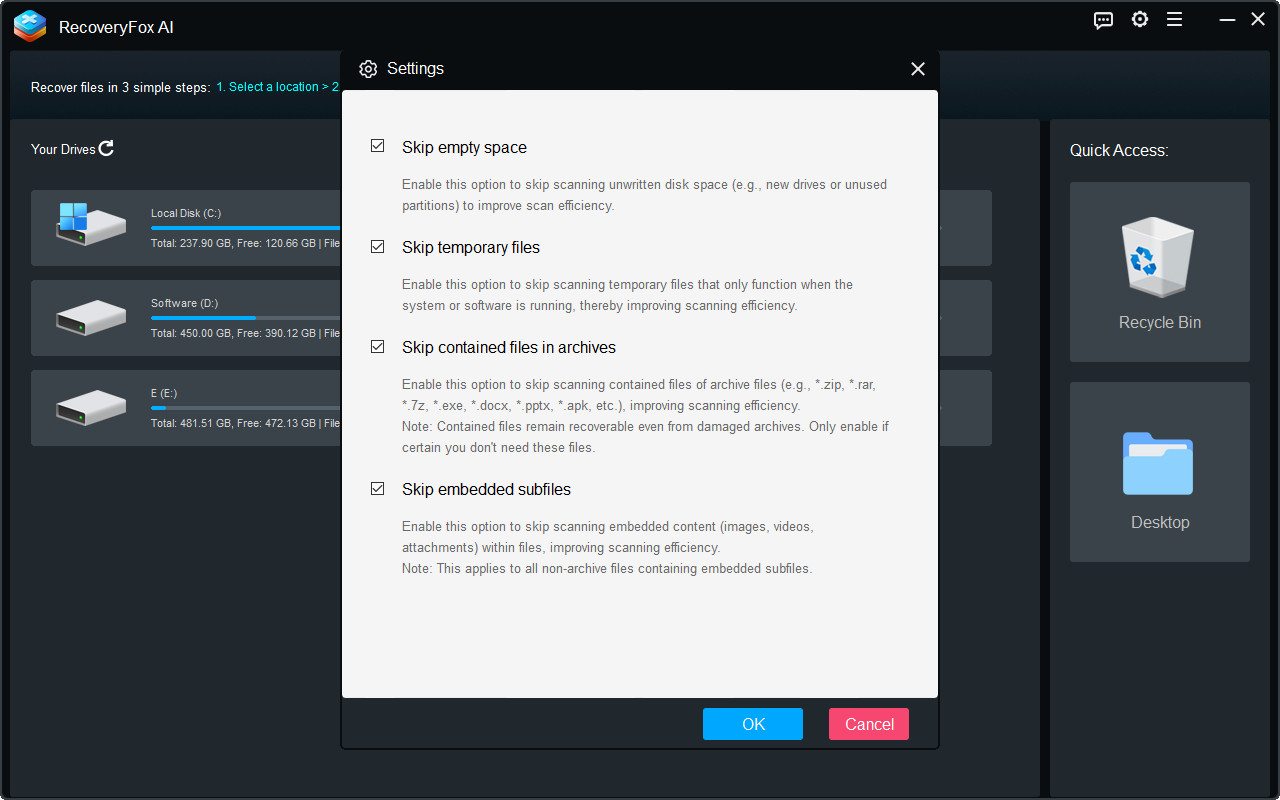
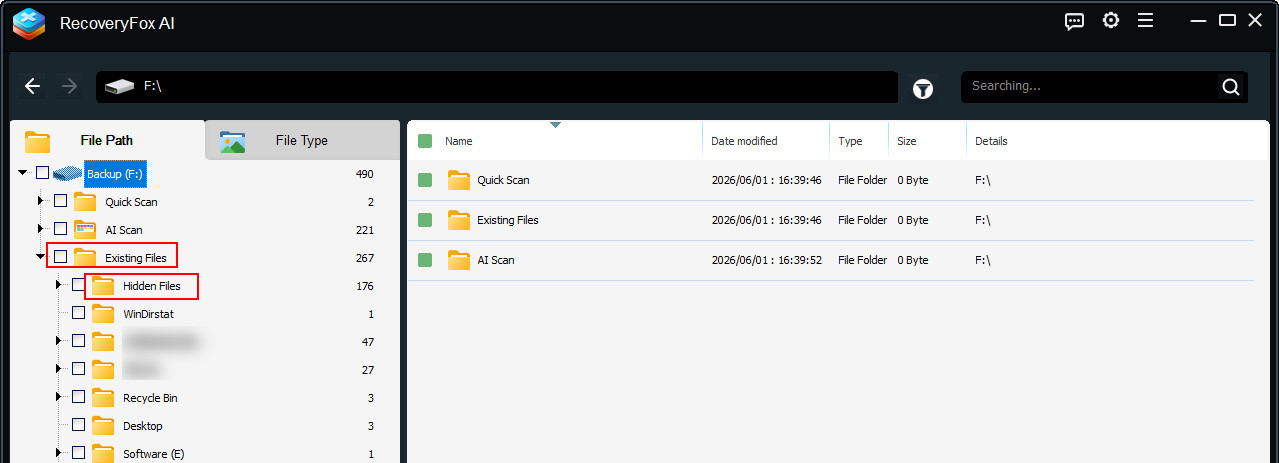
"Include Existing Files" is enabled by default. When enabled, RecoveryFox AI displays both lost files and existing files from the selected device. Existing files are listed in a dedicated Existing Files folder under the File Path tab.
If you choose to show existing files, we also recommend enabling “Group Hidden Files Separately” for easier navigation and comparison. If you do not want existing files to appear in the scan results, simply disable Include Existing Files.
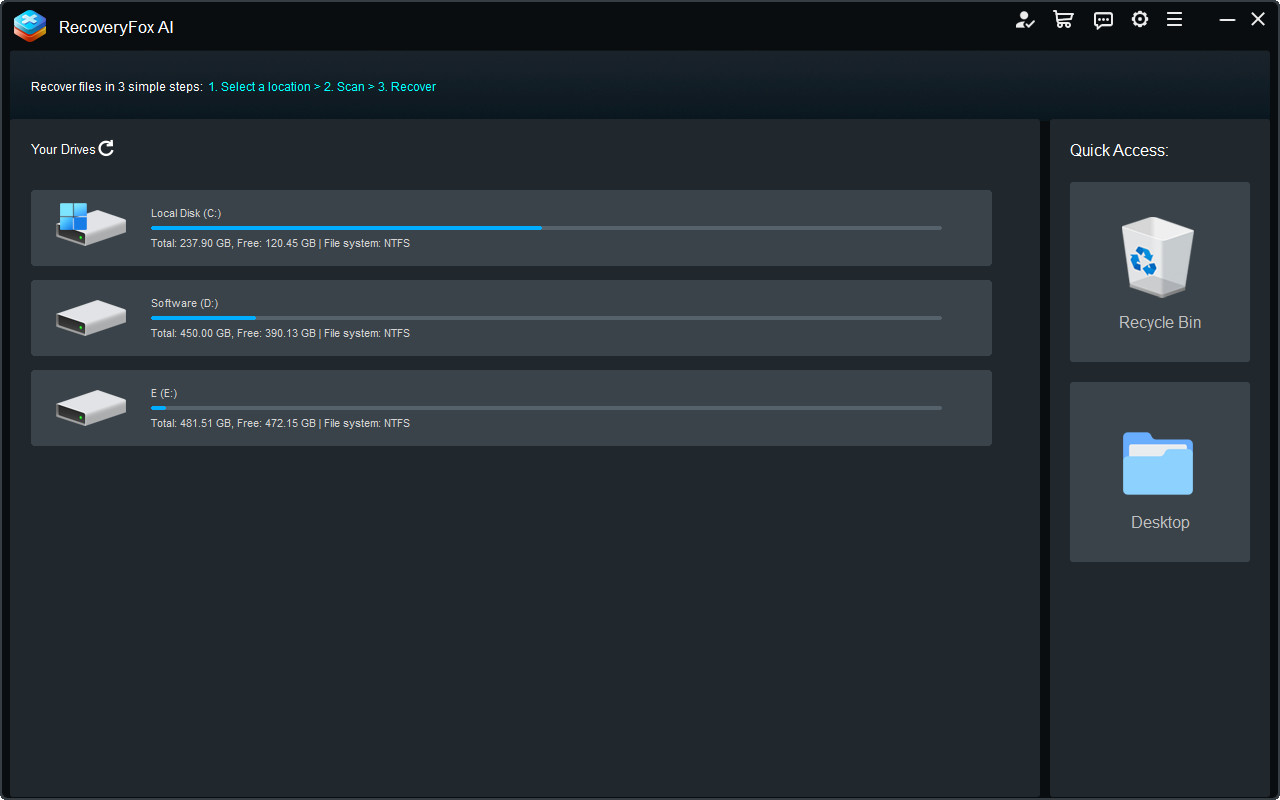
This is also where you begin your data recovery journey by first selecting a location to scan.
To start scanning, hover your mouse over the drive or the location you need to recover data from and left-click on it. There are two tab options:
- Select a drive
Under the [Your Drives] tab, you’ll see all available external and internal drives.
- Specify a location
- Drive not properly connected
- Drive not powered on
- Drive is in a RecoveryFox-unsupported file system
- Drive not recognized by the Windows operating system
- Drive has file system corruption
- Drive letter not assigned
- Drive is hidden or disabled in BIOS
- Software or driver issues
- Drive is encrypted
- Drive has physical hardware issue (If so, stop using the drive immediately and ask for professional data recovery service.)
Under the [Quick Access] tab on the right, we also list the most frequently used locations for quick access: Recycle Bin, Desktop.
NOTE BOX:
If your target drive is not listed in RecoveryFox AI, there could be several reasons for this issue: