


CATEGORIES
![]() OVERVIEW
OVERVIEW

![]() Getting Started
Getting Started
![]() INTERFACE AND BUTTONS
INTERFACE AND BUTTONS
![]() HOW TO USE
HOW TO USE
RECOVERYFOX AI PRODUCT MANUAL
Recover Smarter, Restore Safer
PART 4. HOW TO USE RECOVERYFOX AI
4.2 Recover Files from Emptied Recycle Bin
With the following 3 simple steps, you can recover files from the emptied Recycle Bin:
- Step 1. Select a Location
- Step 2. Start Scanning
- Step 3. Preview and Recover
* Available on:![]() Windows
Windows
* Do Not download it to the affected partition or drive.
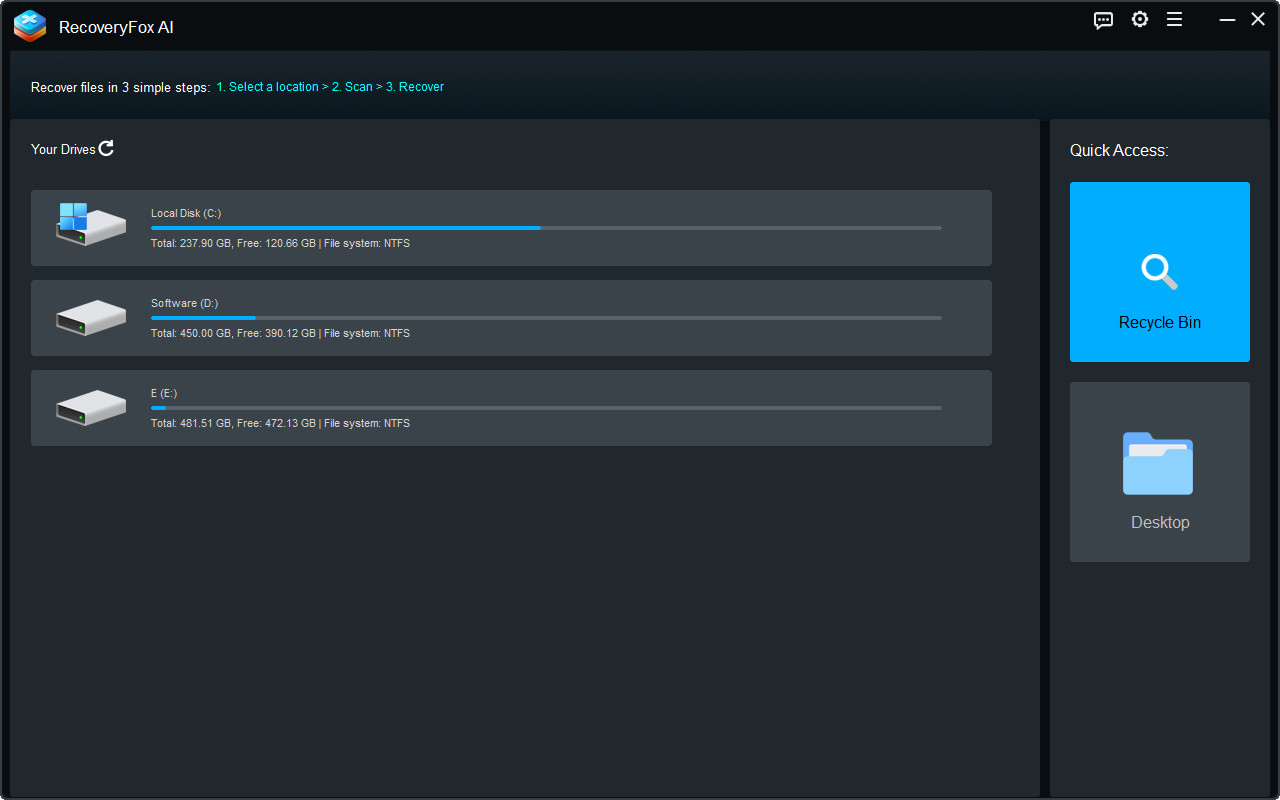
Step 1. Select Recycle Bin as the Location
The first step is to select a location.
To recover your data from emptied Recycle Bin, click on “Recycle Bin” below the “Quick Access” tabs on the right.
Then, the scanning process will begin immediately.
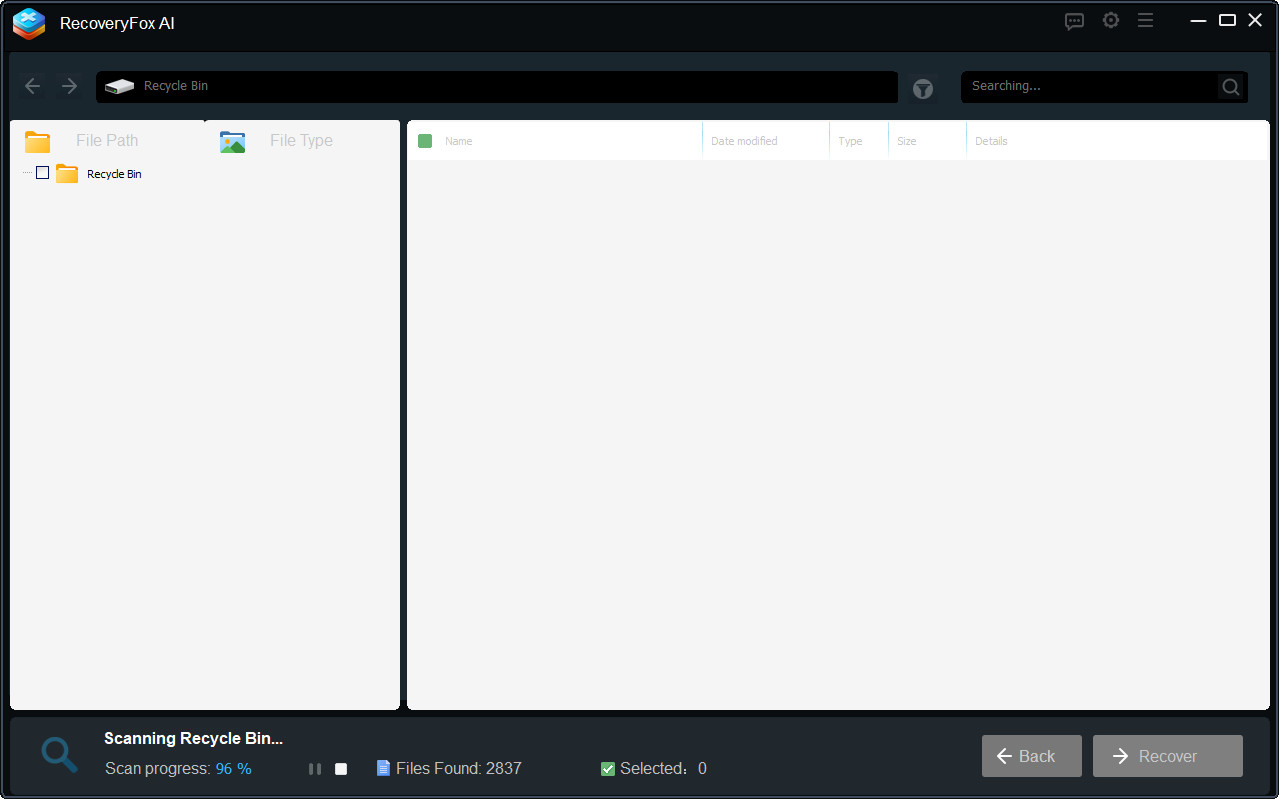
Step 2. Scan Recycle Bin
At the bottom of scanning interface, having a progress bar allows you to track and manage the scanning process. A full scan typically takes a few minutes, but it may take several hours if large files are involved.
During the scanning process, you can click the “Stop” icon to terminate it in advance. ⚠️But not that interrupting may result in partial or incomplete recovery results.
Therefore, it is recommended that you wait patiently for it to complete. Once completed, the status bar will show the total number of files found.
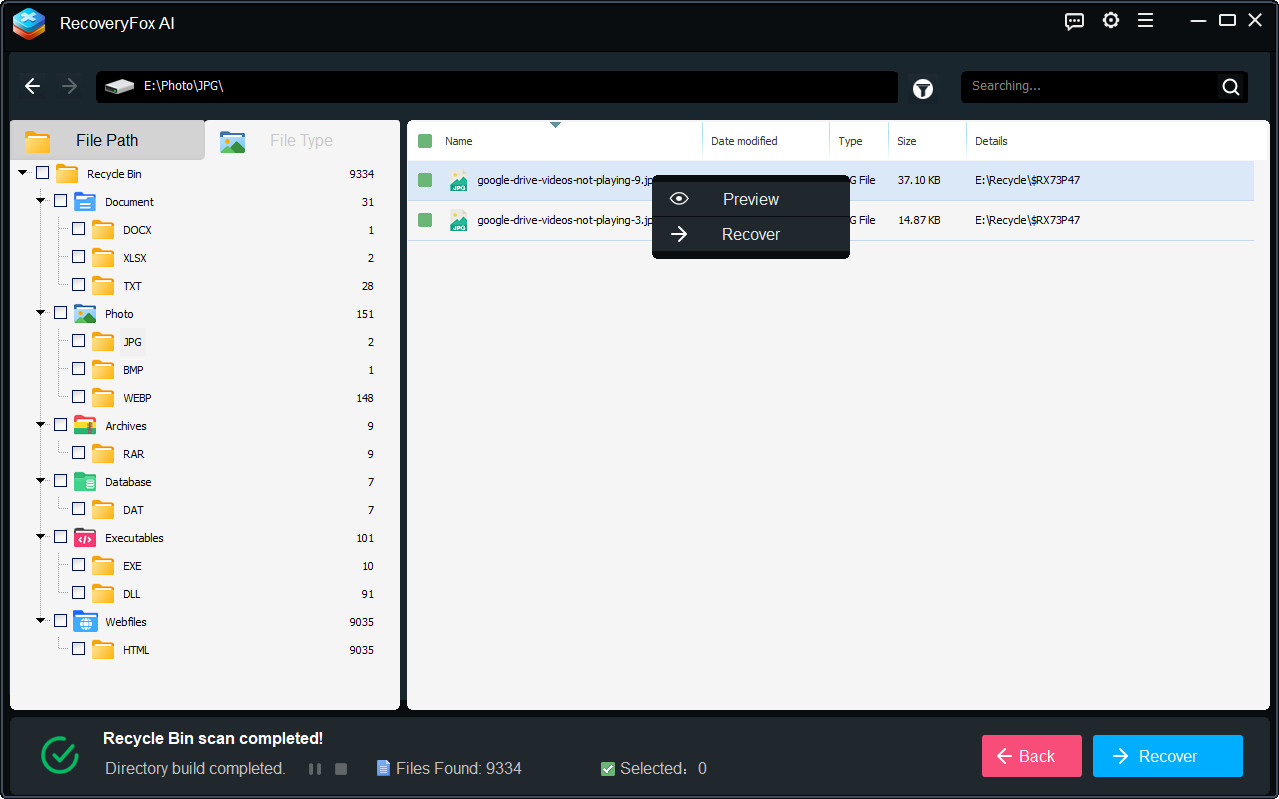
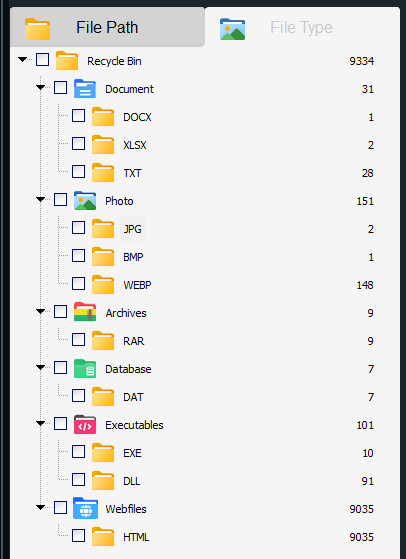
RecoveryFox AI will organize these files by “File Path” and “File Type”. You can see the menu list on the on the left. Your data that were accidently deleted or lost from the Recycle Bin are placed within a folder labeled “Recycle Bin”.
You can switch between the “File Path” and “File Type” tabs to view the full list of scanned results.
Next, hit the “←Back” button to re-start a scan if needed or proceed to the last step – Preview and Recover.
Step 3. Preview and Recover Recycle Bin Results
Finally, from the result list, right-click on the file and choose to “Preview” or “Recover”.
🔔 If RecoveryFox AI’s scan results are overwhelming, you can use its smart filter options to narrow selection quickly and conveniently.
Options to Filter Result Files
Option 1. Filter Files by File Path
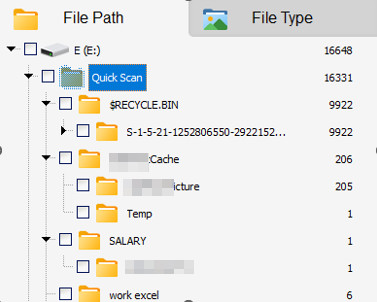
Under the “File Path” tab, click on the downward arrow icon next to the “Quick Scan” folder to navigate through its directory structure and locate your files.
Then, scroll down the list on the right and select the files you want to preview and recover.
Option 2. Filter Files by File Type or Format
You can switch to “File Type” to view results by type subfolders e.g. Documents, Photo, Video, Audio, Game, Webfiles, etc.
Click any subfolder to further narrow the list to explore files of a specific formats. For example, JPG, BMP, WEBP for Photo; DOCX, XLSX for Document.
Option 3. Filter Files by Modified Date
After you stop or finish the scan, you can narrow the results by selecting a range of dates when the deleted files were last modified.
If you remember when the file was last modified — congratulations! You can manually select the date in the calendar to get more accurate results.

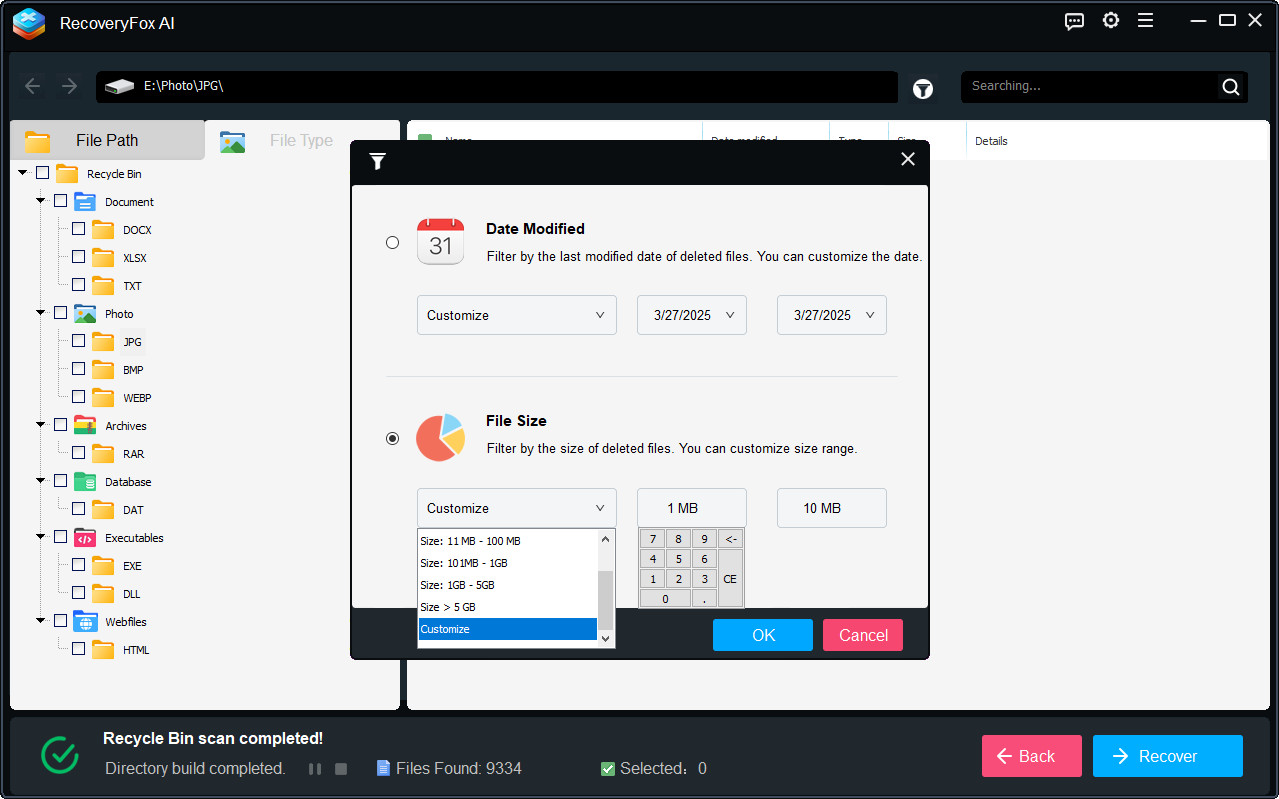
Option 4. Filter Files by File Size
You can also choose a preset to roughly set a file size range.
Or, if you have a good idea of the approximate size of the files you're looking for, you can customize the size range to narrow the search quickly.
Option 5. Filter Files by Name/Keywords
Remember the filename? That would be great! Just enter the filename or relevant keywords into the top search bar to target specific files effortlessly.
It’s important to note that this only applies to files whose names are preserved. For files losing their names, RecoveryFox AI assigns numerical names to differentiate them.

Preview Options
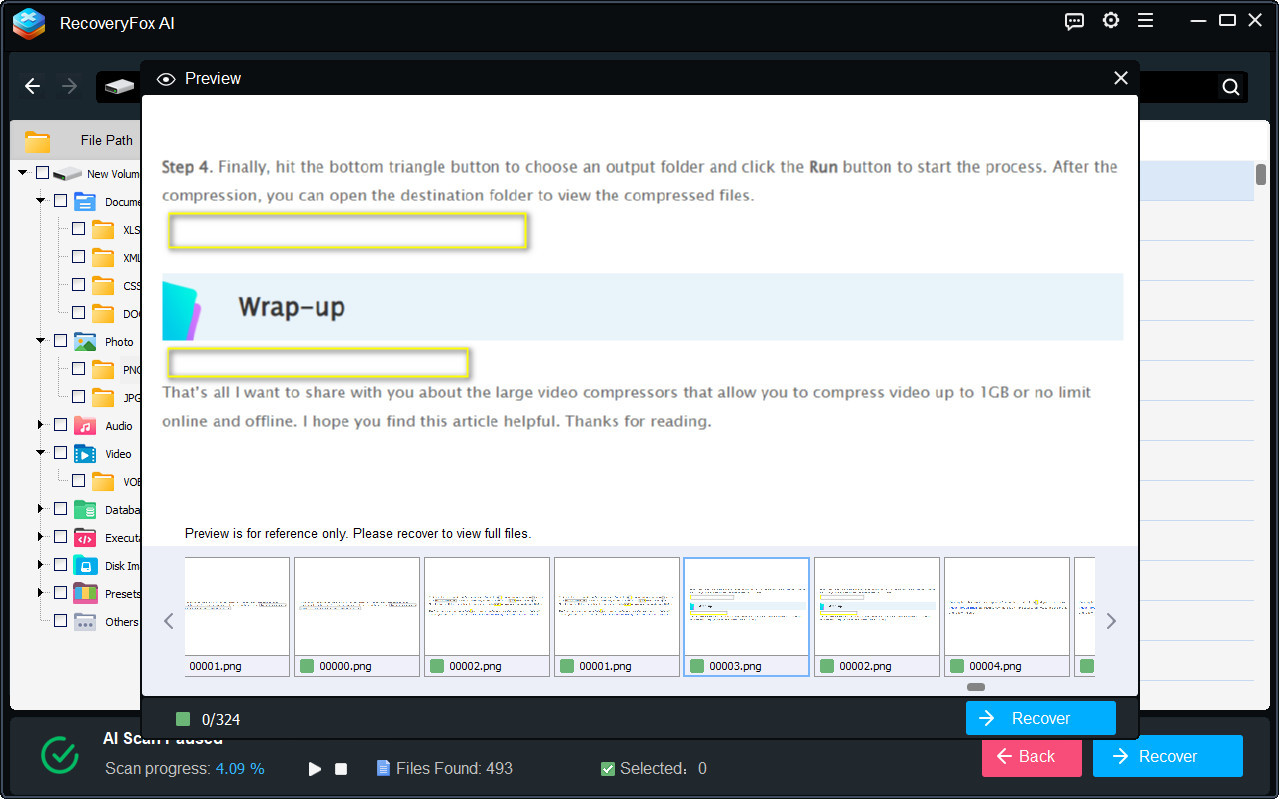
1. Preview Photo
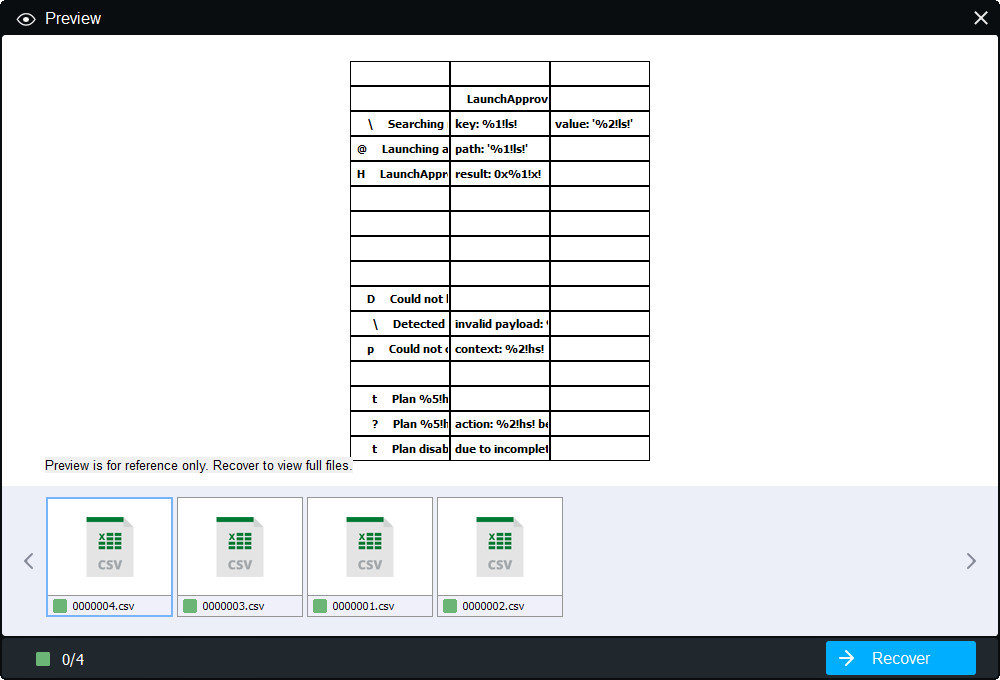
2. Preview Documents
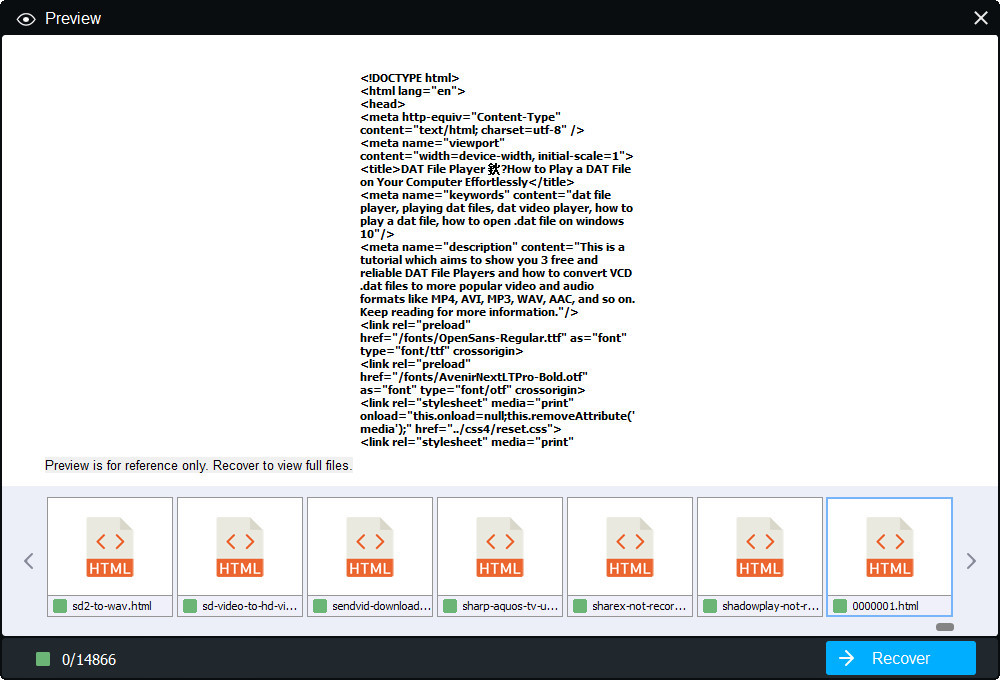
3. Preview Webfiles
Recover Options
RecoveryFox AI provides flexible recovery options, allowing you to recover data in various ways depending on your needs. Whether it is a single file being previewed, multiple files, an entire folder, multiple folders along with individual files outside of these folders, or all found files.
