


CATEGORIES
![]() OVERVIEW
OVERVIEW

![]() Getting Started
Getting Started
![]() INTERFACE AND BUTTONS
INTERFACE AND BUTTONS
![]() HOW TO USE
HOW TO USE
RECOVERYFOX AI PRODUCT MANUAL
Recover Smarter, Restore Safer
PART 3. INTERFACE AND BUTTONS
3.2 Scanning Interface
The scanning process of RecoveryFox AI consists of Quick Scan and AI Scan.
Quick Scan:
Quick Scan works best for getting recently deleted files back with their original names and folder structure. Every time you initiate a data recovery process, RecoveryFox AI begins with the Quick Scan mode automatically. It usually takes seconds or minutes to make a quick thorough scan. You can find the scanning results in a dedicated ‘Quick Scan’ folder under the “File Path” tab.
Once Quick Scan completes, AI Scan will start automatically.
AI Scan:
With the advanced and sophisticated AI algorithms, RecoveryFox AI can identify and rebuild your lost data - no matter what the reason for the data loss, as long as it has not been completely overwritten– into a single file and organize them by type for easy searching.
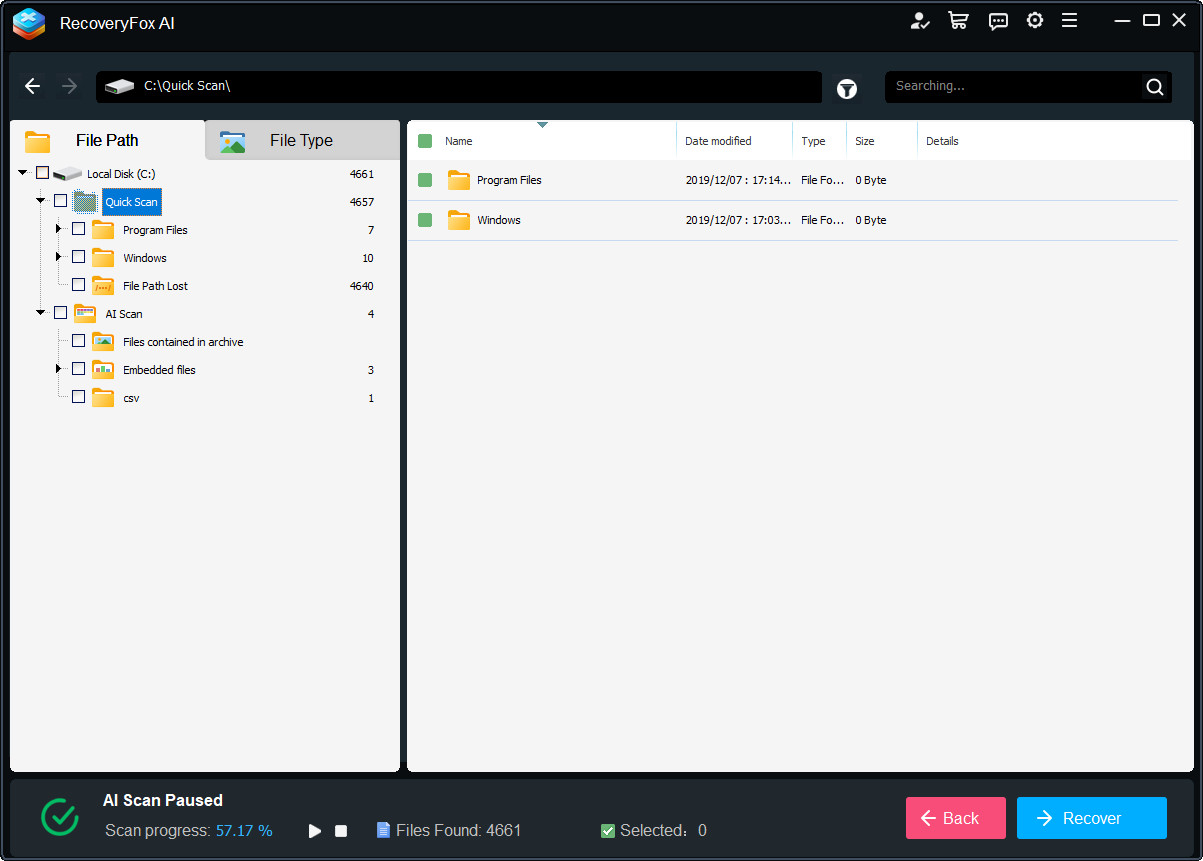
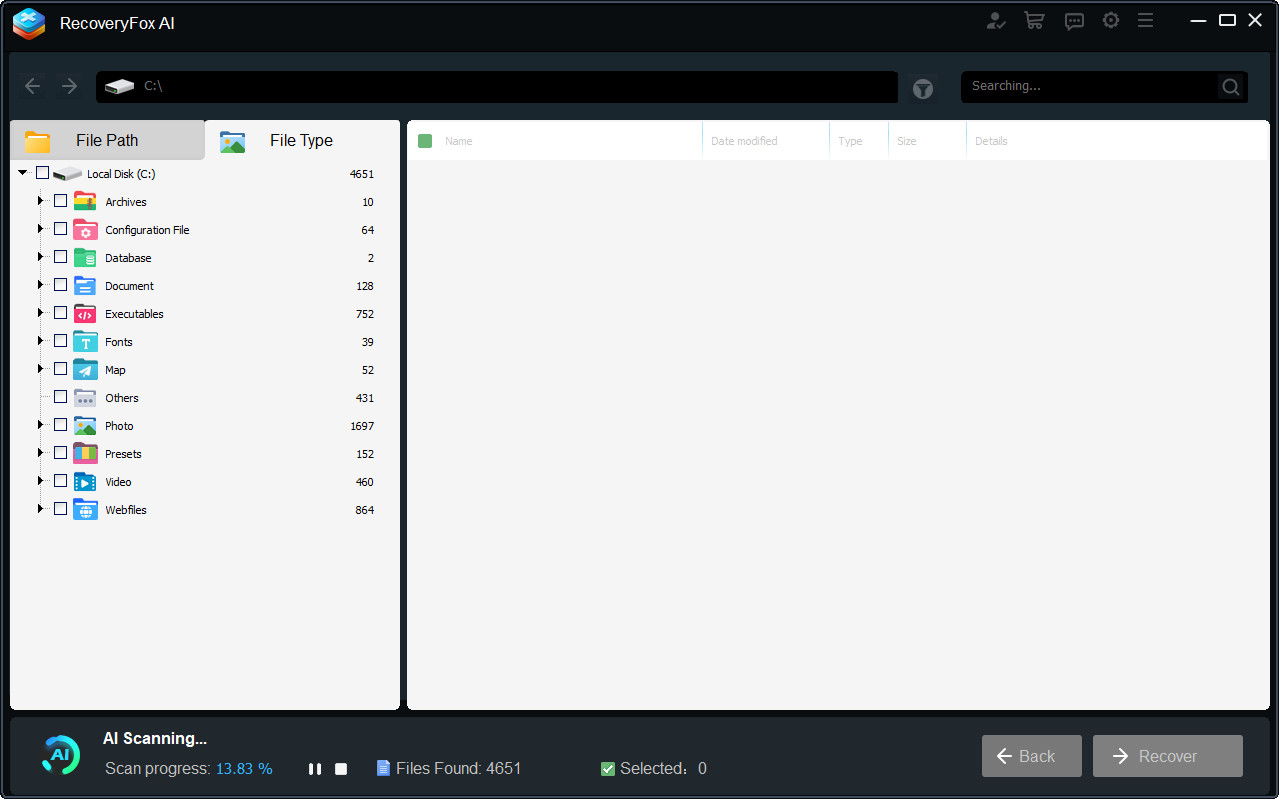
- Scanning Status Bar
At the bottom of the scanning interface, you can see a progress bar that displays the status of the scanning progress in percentage. It also shows the number of files it found and the number of files you selected to recover.

You can pause and stop the scanning at any time by click button [Pause] and [Stop].
Hit [Back] to back to Startup interface if you need to re-select the file location or hit [Recover] to start recovering data.
- Scanning Result Menu
RecoveryFox AI organizes scan results by: [File Path], [File Type], and [Existing Files ] (if this option is enabled in Settings before recovery).
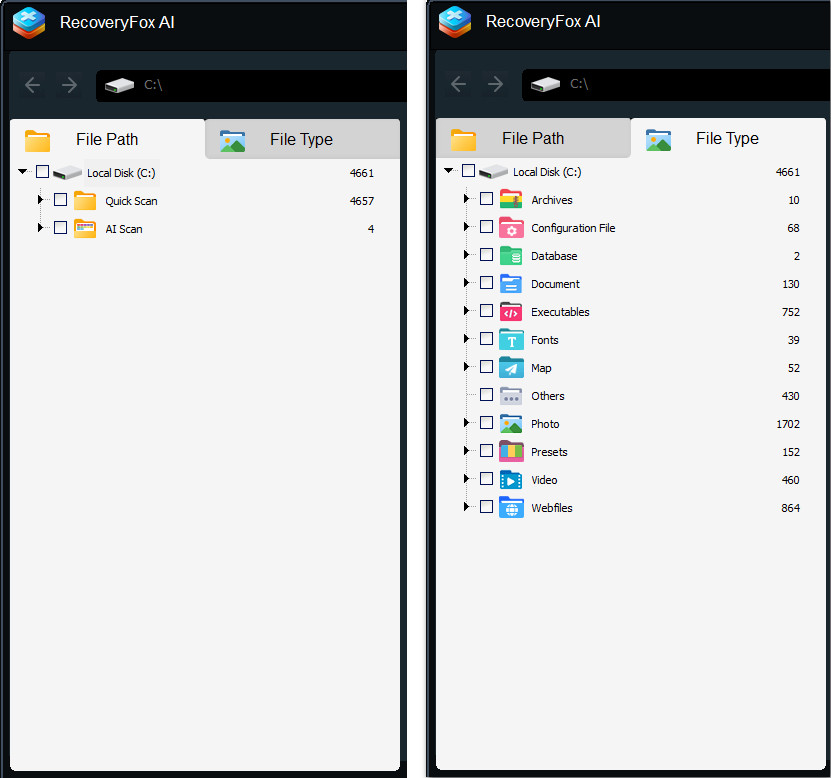
Menu Option 1: File Path
Under the [File Path] tab, the results are organized into folders based on the scan type performed. That is: Quick Scan and AI Scan.
Under the Quick Scan folder, the founded files are further organized by their original file paths (if available) or by the location where they were found on the storage device.
Files in the AI Scan folder are grouped by type. Additionally, RecoveryFox AI can detect and recover embedded content and fragments from various file types, such as Word documents, PPT files, and ZIP archives. These recovered embedded files are organized into two dedicated folders:
- Files contained in archive
- Embedded files
These dedicated folders for embedded content and fragments provide a more user-friendly approach to help you reconstruct them if needed.
Menu Option 2: File Type
Under the [File Type] tab, the scan results are categorized by file type. Under each file type category, the software lists all recovered files of that type, regardless of their original location or how they were scanned.
RecoveryFox AI currently supports classification of over 500 file types, covering a wide range of file categories, including
- Document
- Photo
- Camera
- Model File
- Audio
- Video
- Archives
- Database
- Executables
- Webfiles
- E-books
- Configuration File
- Backup File
- Disk Images
- Fonts
- Game
- Virtual Software
- Webfiles
- Phone
- Map
- Presets
- Others
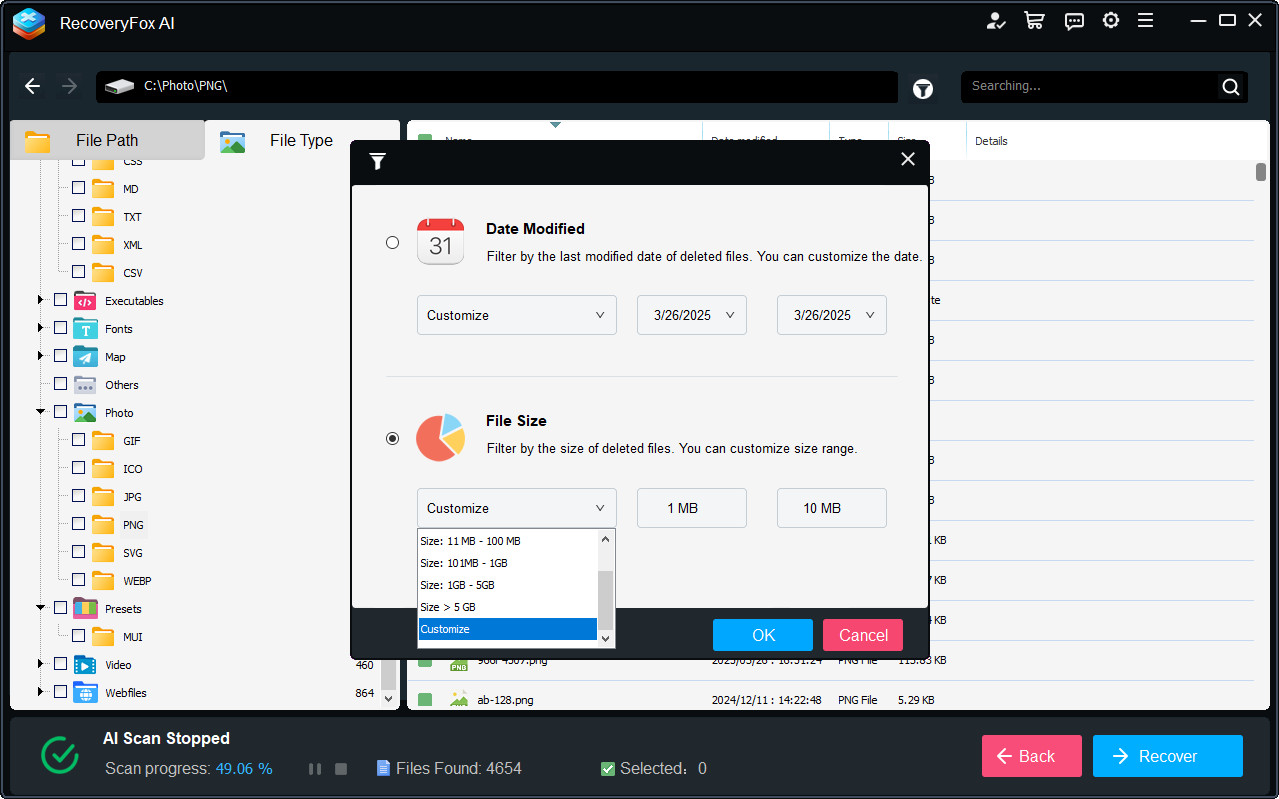
Filter Results by Type, Date, and Size
You can refine your search results in RecoveryFox AI by selecting a specific File Type category on the left panel or using the Filters icon (Note that this feature is only available after stopping or completing the scan process).
The filtering options include:
- By Date Modified: Filter files based on their last modification date, helping you quickly locate recently edited or older files.
- By File Size: Narrow down your results by specifying a size range, from KB to GB, making it easier to find large or small files.
Know the filename? Perfect! Just type it or the keywords into the search bar, and RecoveryFox AI will instantly find it, making your recovery incredibly fast.
TIPS Box:
If you know the original location of the lost files:
Use the File Path tab to navigate to the specific folder where the files were stored.
If you’re looking for specific types of files:
Use the File Type tab to quickly filter and locate documents, images, videos, etc.
If you’re unsure which scan method recovered your files:
Check both the Quick Scan and AI Scan folders under the File Path tab to ensure you don’t miss anything.